Credit
Download |
Sources |
|---|---|
Requirements (on-premise)
GLPI Version |
Minimum PHP |
Recommended |
|---|---|---|
10.0.x |
8.1 |
8.2 |
- orphan:
Notă
This plugin is available without a GLPI Network subscription. It is also available on GLPI Cloud.
Install the plugin
Go to the marketplace. Download and install the plugin “Credit”.
Setting up the plugin
Creating a credit type
From Setup > Dropdowns,
click on Credits then Credit types.
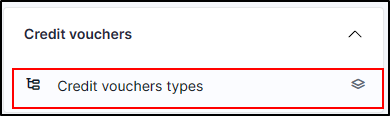
Click on add.
Enter a name representing the type of credit granted

Add credit to customer entity(ies)
Example : We will create 3 types of credit:
For a new follow-up
For a new task
For a new solution
You can create a single type of credit which will group together the 3, it depends on the management of each case.
In Administration > Entities, select the entity that will receive the credits.
Go to the Credit section
In the section Add a credit, enter a name for the new credit
Define the type of credit created earlier
The start and end dates of the credit
Activate it,
Make it available or not in the child entities (note that if you are in the parent entity, it will be accessible to all entities)
The quantity of credit sold
The authorisation to overconsume or not
Click on add
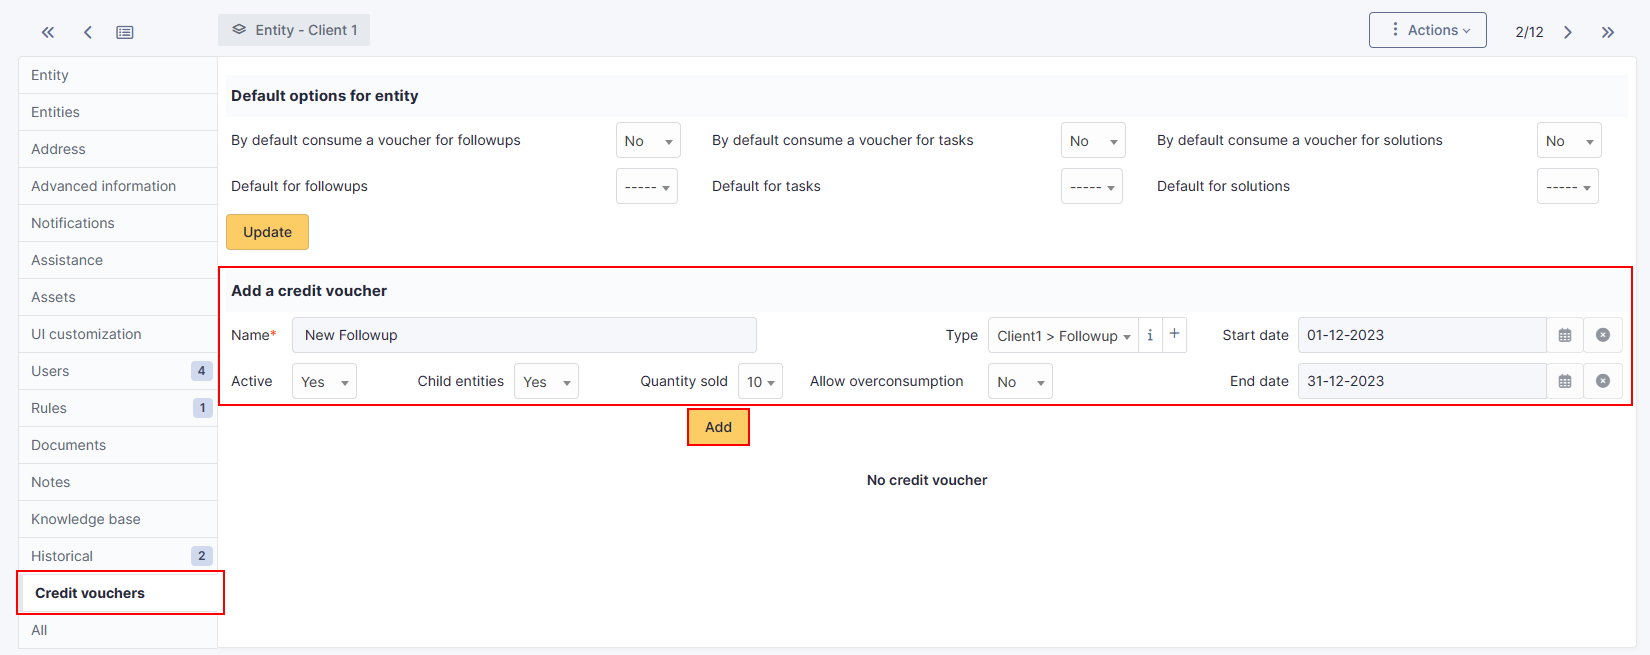
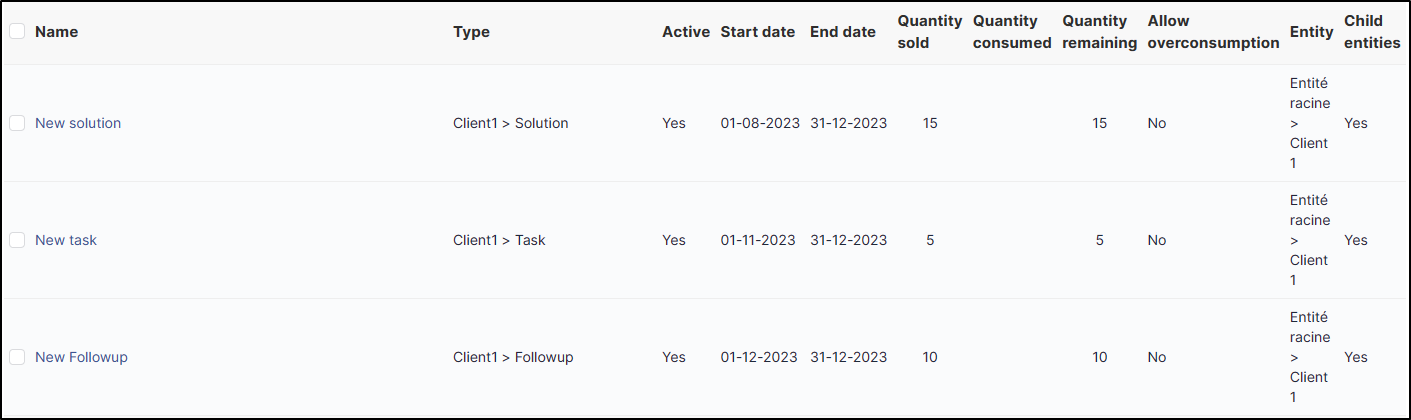
Here, we’ll do the same for the 3 types of credit (followup, task and solution)
It is therefore possible to enter different values (number of credits, validity, overconsumption, etc.) for each credit:
Define default values
In Administration > Entities, select the entity that will receive the credits
Go to the Credit section
In the Default options for entity section
Select the type of credit by action

Click on Update
Atenționare
„Caution Indicating credit types does not allow automatic settlement. It pre-selects the credit but it must be settled by the technician.
Counting credits
When a ticket is created, you can choose whether or not to deduct the corresponding credits.
In our example, we have chosen to deduct each action.
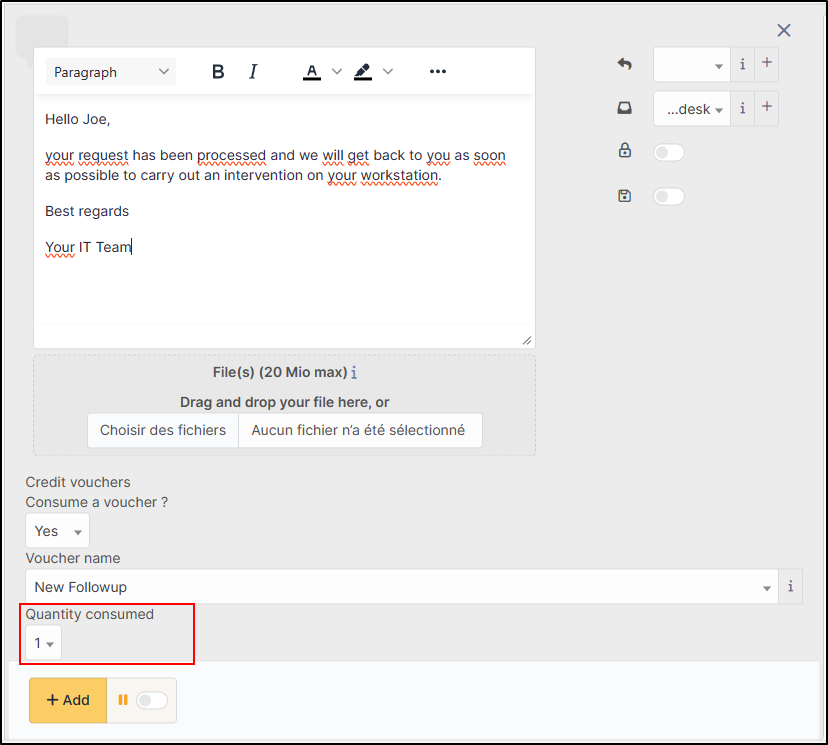
If we are doing a follow-up, we can deduct the credit assigned by default:
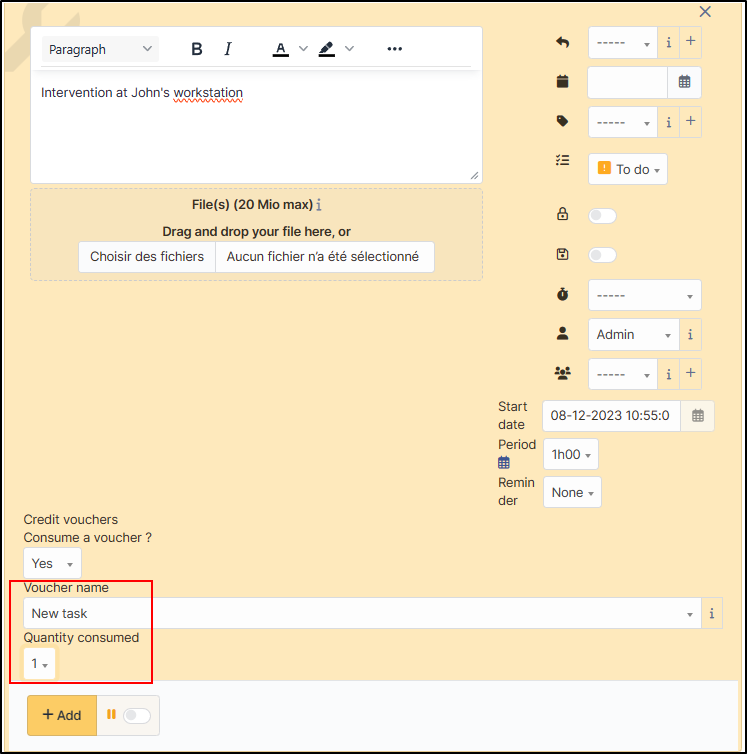
The same for a task:
And for a solution :
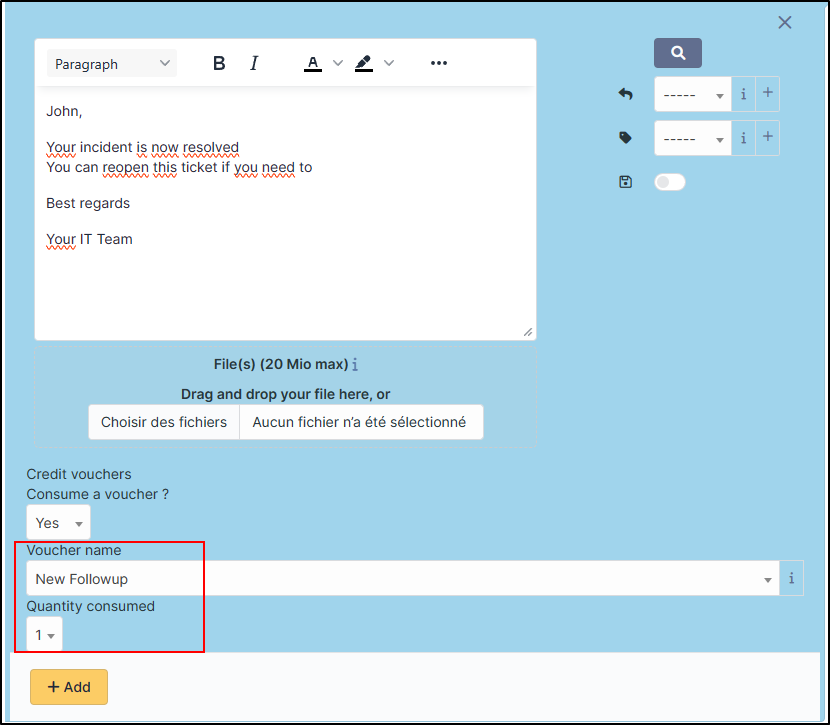
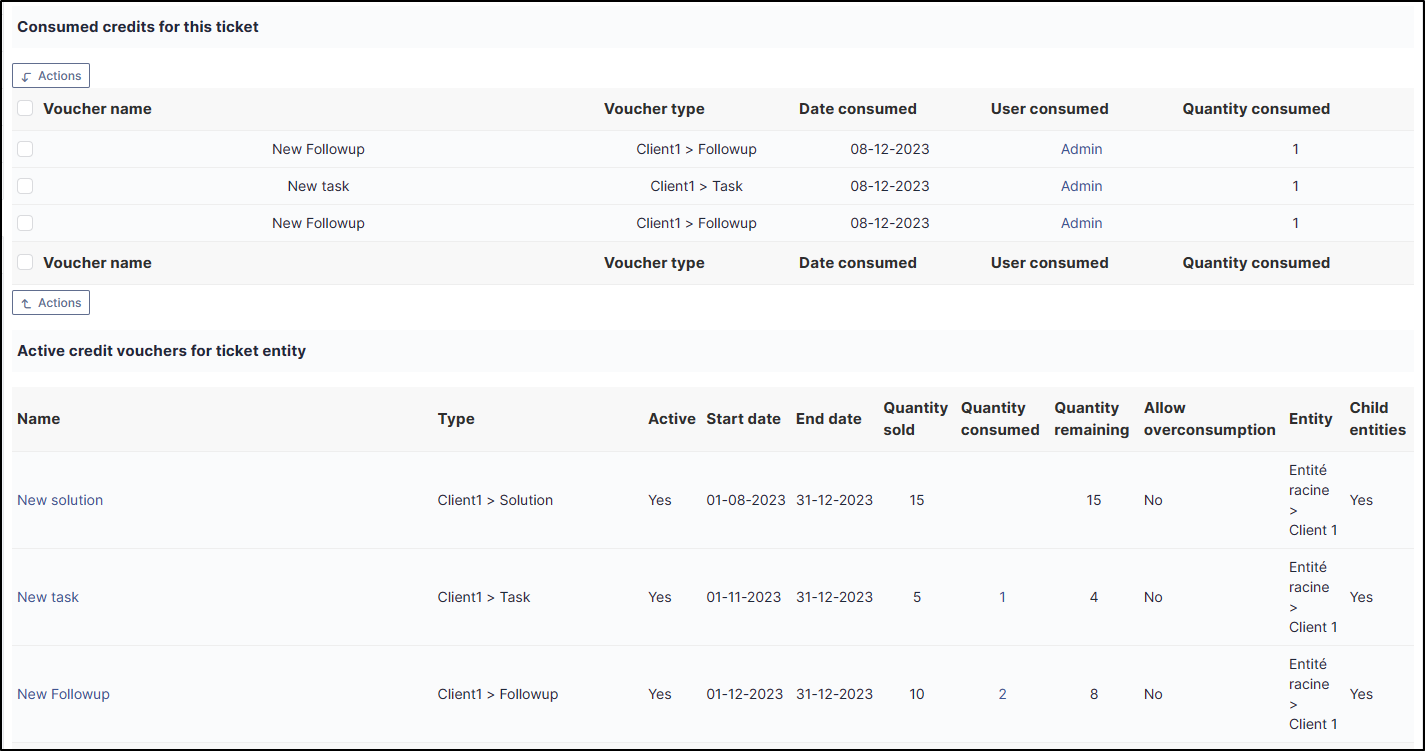
In the Credit section of the ticket you can see a summary of credits spent and remaining
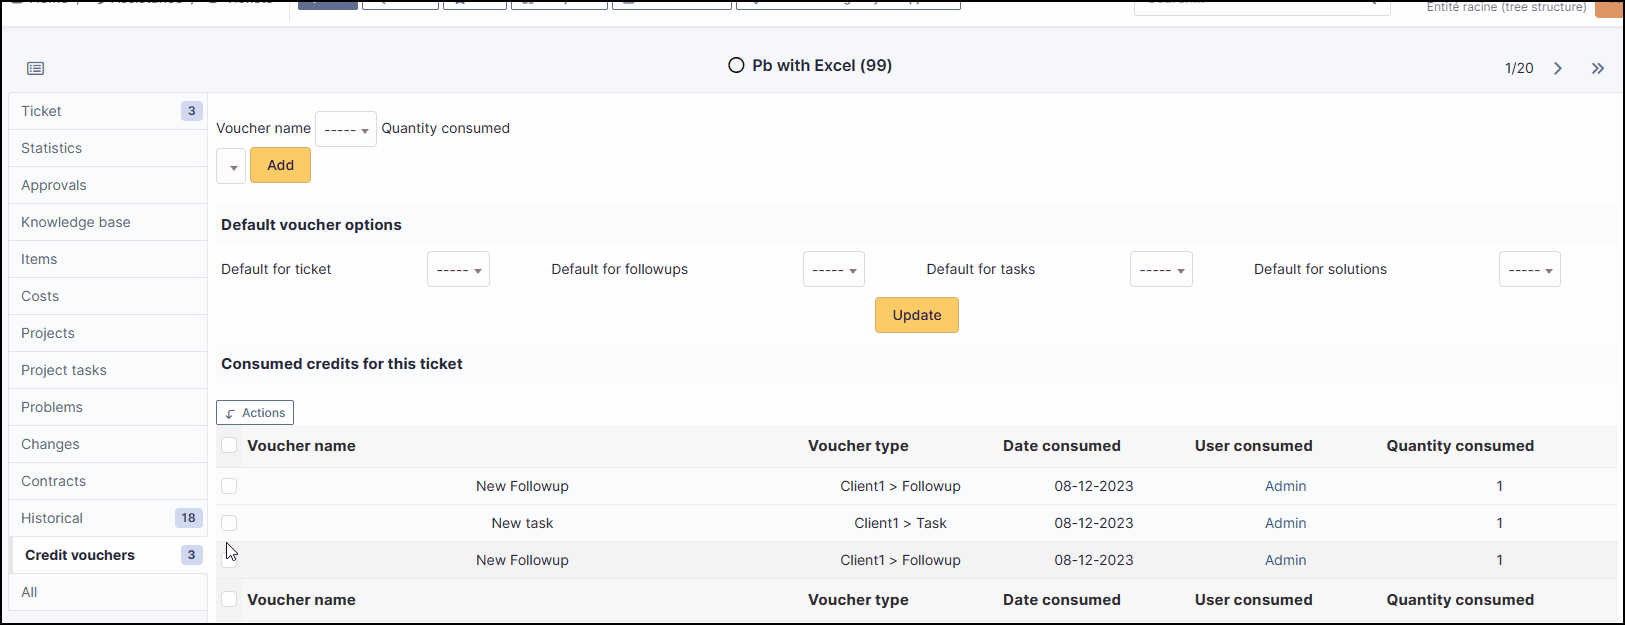
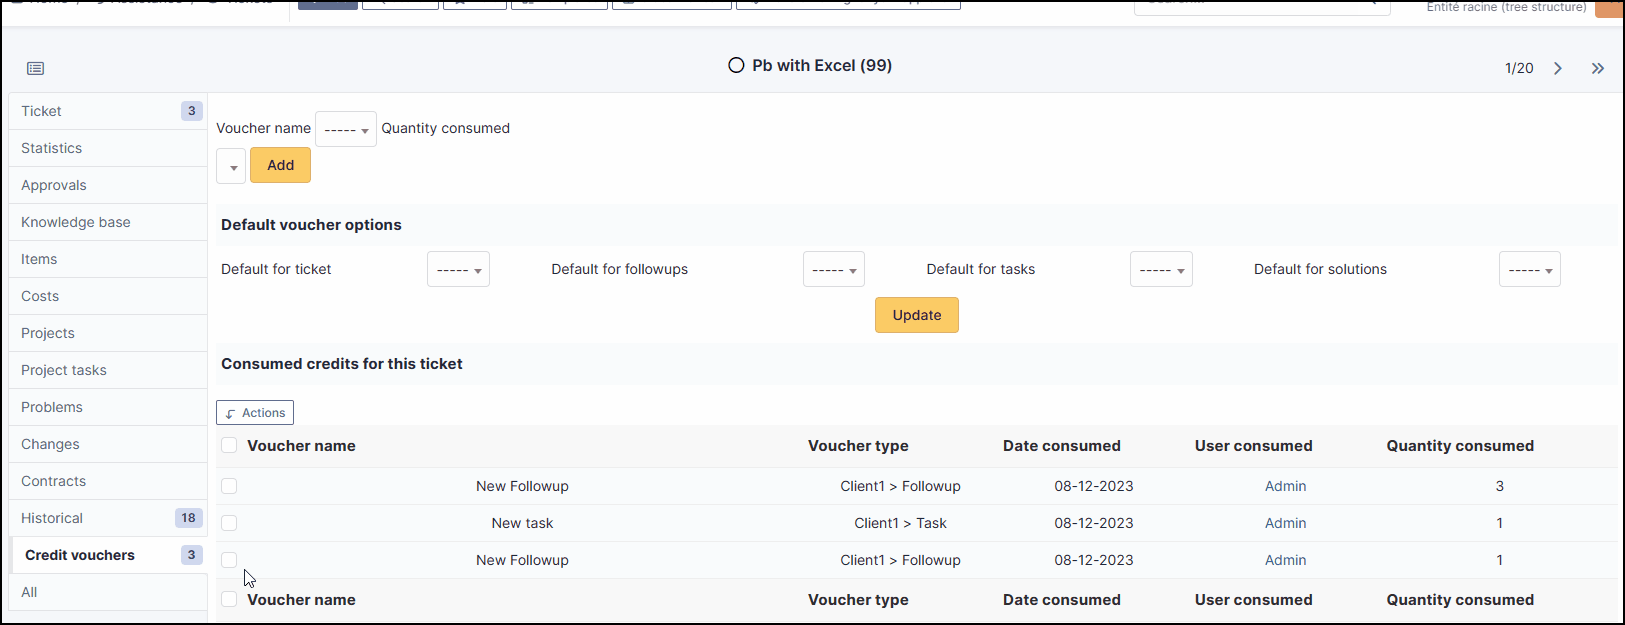
Modify a credit on a ticket
Increase or decrease a granted credit
You can modify credits on a ticket if a readjustment is necessary.
From the ticket in question, go to the credit section
Select the credit you wish to adjust
Click on Actions
Click on Update
Click on Quantity consumed then add the desired quantity
Click on Send
Notă
- See how to proceed
Delete deducted credits
From the ticket in question, go to the Credit section
Select the credit you wish to delete
Click on Actions
Click on Delete permanently
Click on Send
Notă
- See how to proceed
Credits will be automatically reallocated in the credit bank
Including an expired credit
If the credit has expired, it will not be proposed in the list of available credits. You will not be able to deduct it. You will need to change the end date of the credit to be able to use it again.
Notification of expired credits
An automatic action is available to notify you when a credit has expired.
From Setup > Automatic actions, modify the creditexpired action to suit your needs.
Click on Save
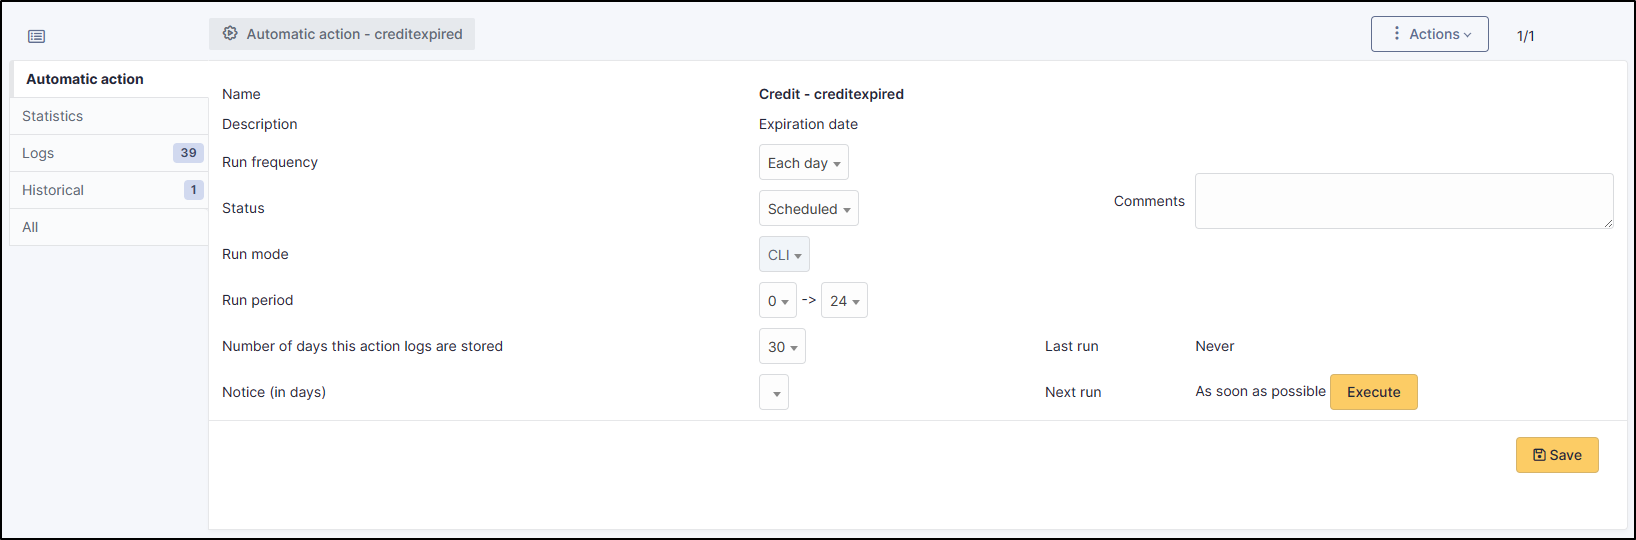
You can of course customise the notification to suit your needs (Setup > Notifications > Notifications > credit expired)
FAQ
If you have any questions about using the plugin, please consult our FAQ
