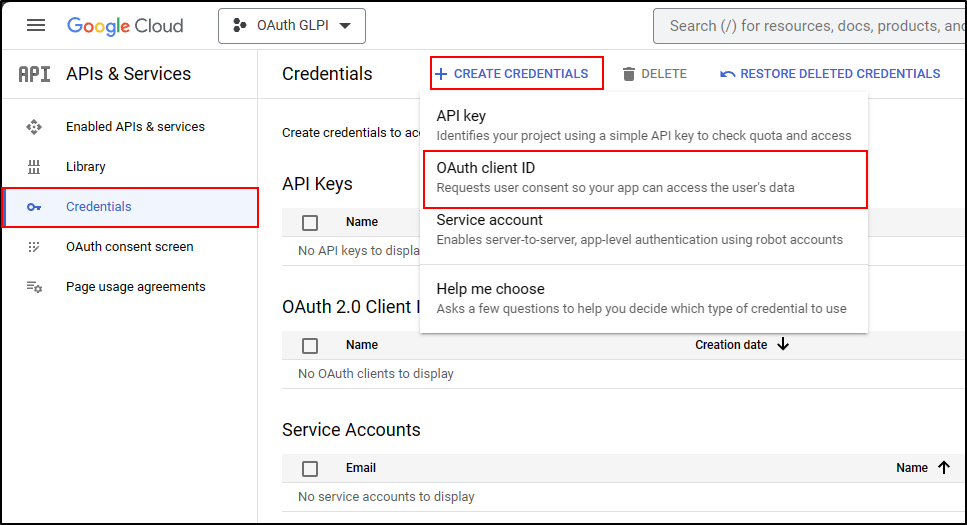
Google
Creating a project
From your Google console (administrator access is required)
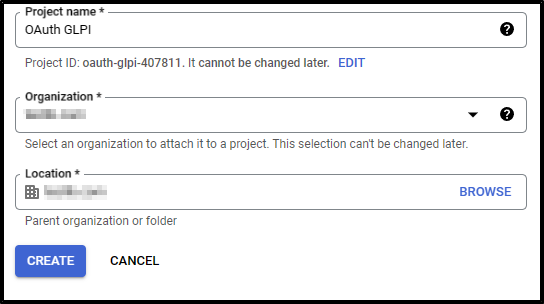
Go to your organisation then new project
Enter the name of your project
Click on Create
Return to your organisation,
Select your project
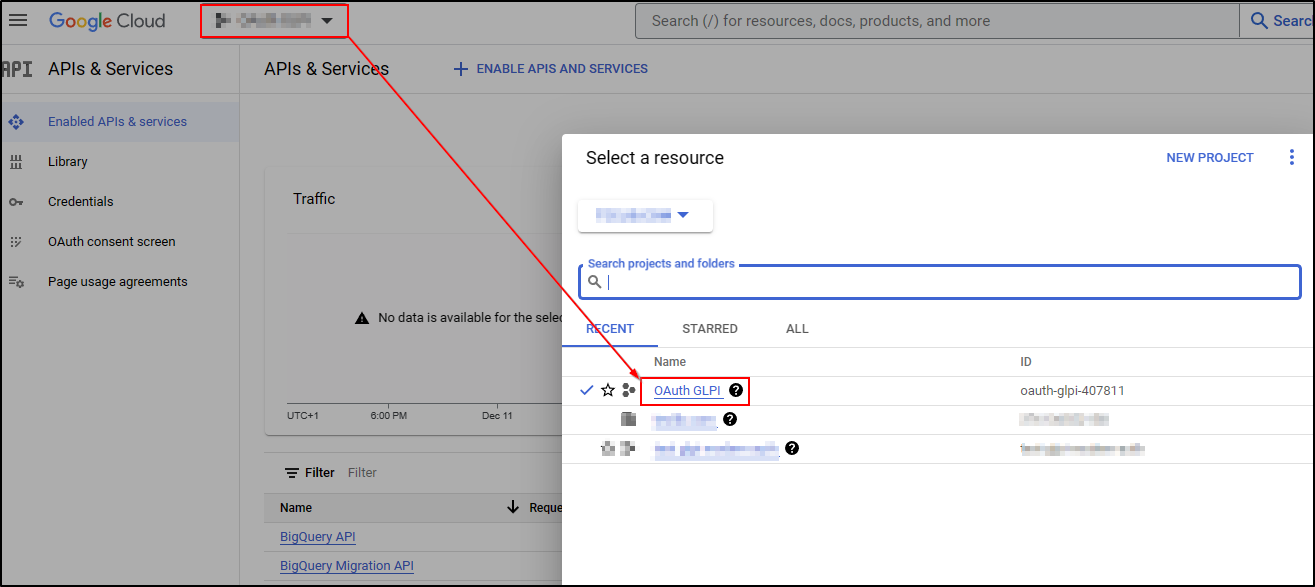
Setup Oauth access
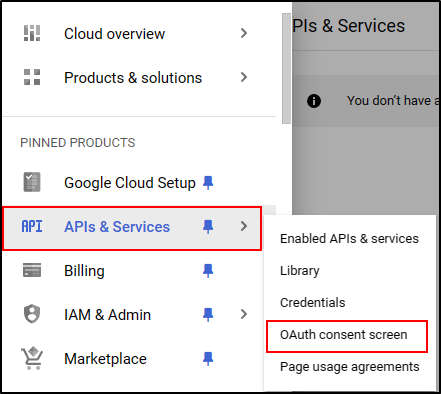
From the menu, click on APIs & Services
Then OAuth consent screen
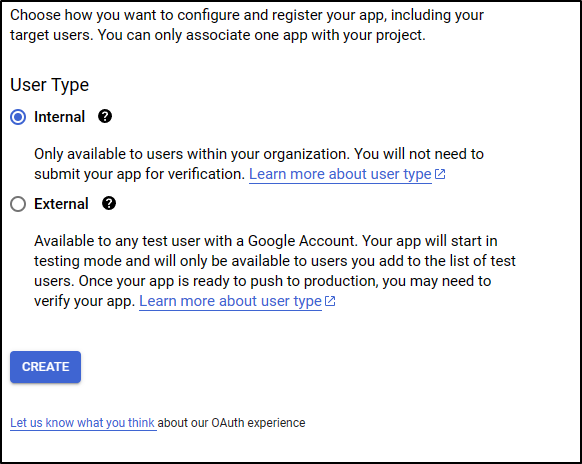
Select the type of access that will be granted to the application (internal or external users)
Then click on Create.
Enter (as a minimum) a name for the application, an email address for application support and the developer’s email address (this information is compulsory).
Click on Save and continue.
In the Scope section
Click on Add or remove application fields
Add auth/userinfo.email auth/userinfo.profile and openid
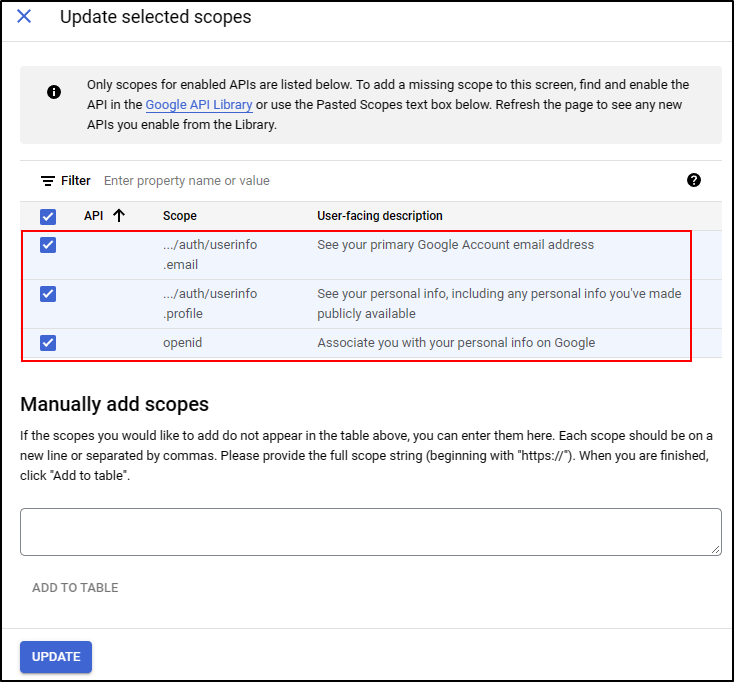
Click on Update
Then Save and continue
ID settings
Setup GLPI
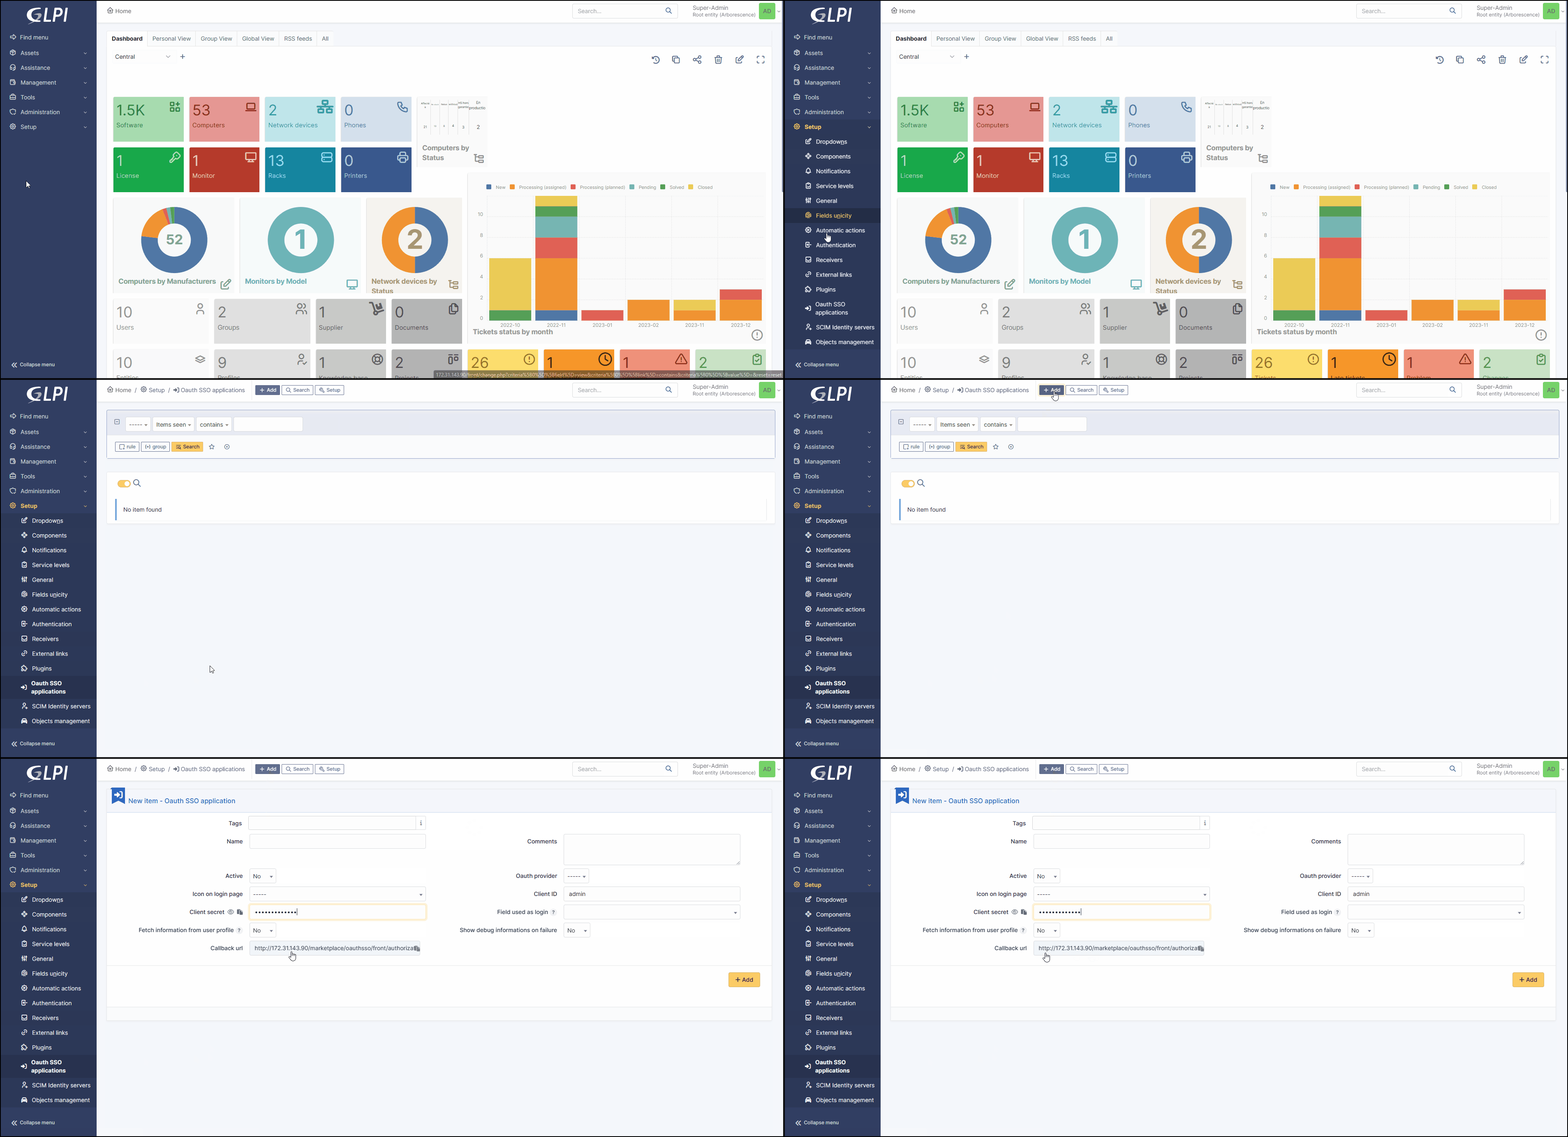
From Setup > Oauth SSO applications
Click on Add
Select Google in the Oauth provider field
Select the icon that will be visible on the home page
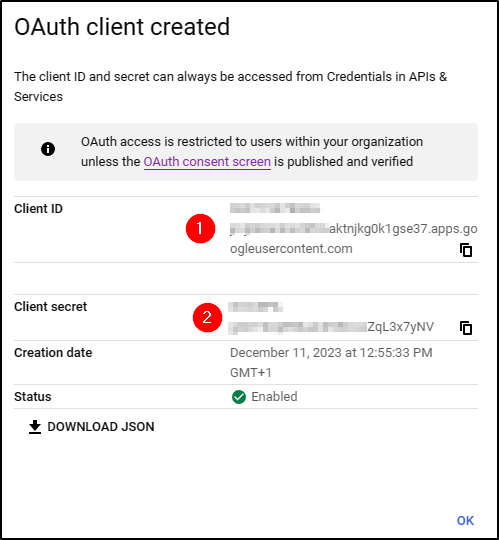
Enter the Client ID (number 1 on the previous screenshot)
Enter the Client secret (numbered 2 on the previous screenshot)
Enter the field user ID [1]
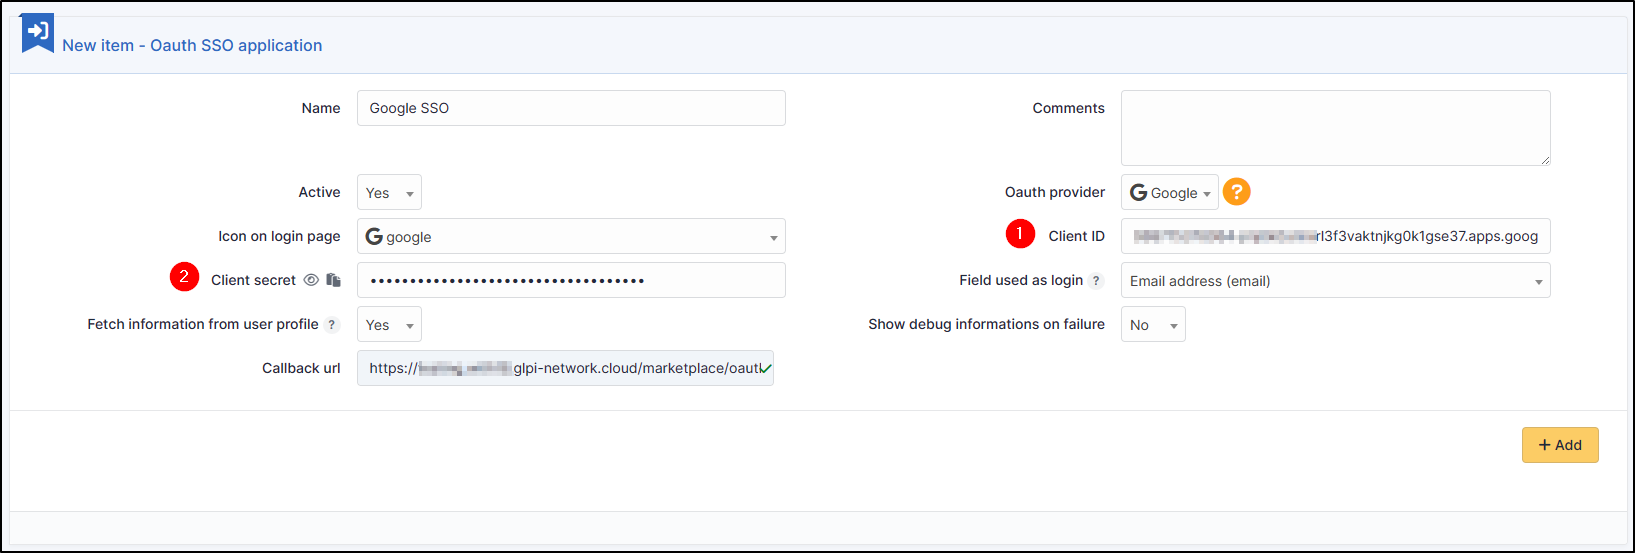
Click on Add
From the home page, the new Oauth SSO login option will be visible:

참고
The first time a user logs on, they will be asked to accept access authorisations for their profile
