OAuth IMAP
Download |
Sources |
|---|---|
Nota
Microsoft is gradually removing the TLS 1.0 and 1.1 protocols for all Microsoft 365 applications. In order to keep your collector running, you need to add the Oauth IMAP plugin, which is available in the marketplace.
Suggerimento
The Oauth tokens for the collector, retrieved during authentication with Azure by the OauthIMAP plugin, are “offline” tokens that delegate authorisation to a third-party application (GLPI). These tokens provide a renewal code that will be used by the application to renew them automatically without user intervention. You will therefore not be asked to re-authenticate after the 1st authorisation request.
Requirements (on-premise)
GLPI Version |
Minimum PHP |
Recommended |
|---|---|---|
10.0.x |
8.1 |
8.2 |
- orphan:
Nota
This plugin is available without a GLPI Network subscription. It is also available on GLPI Cloud.
Supported mail services
OAuth IMAP support :
Install the plugin
Go to the marketplace. Download Oauth IMAP and enable it
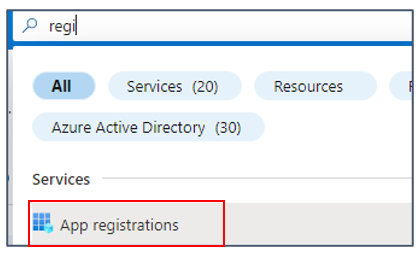
Open the Azure Portal for your tenant
In the search box type registration
then select App registrations
Here are the configuration steps including configuration phases on the Entra side.
Register your Entra application
Create the application
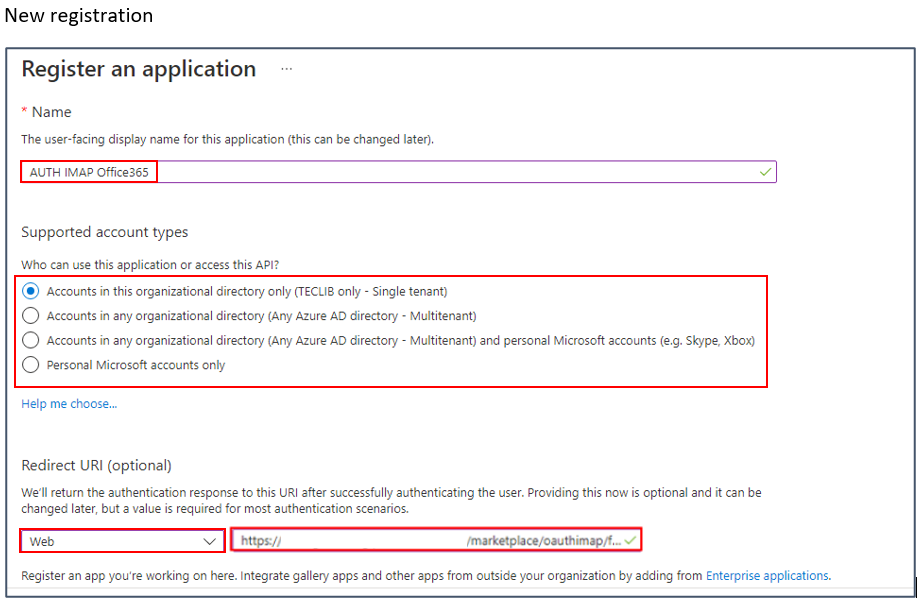
Click on New registration
Enter the desired name, select the type of account supported then enter the redirection URL (present in the configuration of the plugin from your GLPI interface: https://XXXXXXXXXXXXXX/marketplace/oauthimap/front/authorization.callback.php) specifying the Web option
Then click on Register.
Add a secret
In the Certificates and secrets tab
Click on Client secrets
Then New client secret

Enter a description and then an expiration date
A secret value is then generated. Keep this value well because once you have left this page, it will no longer be recoverable

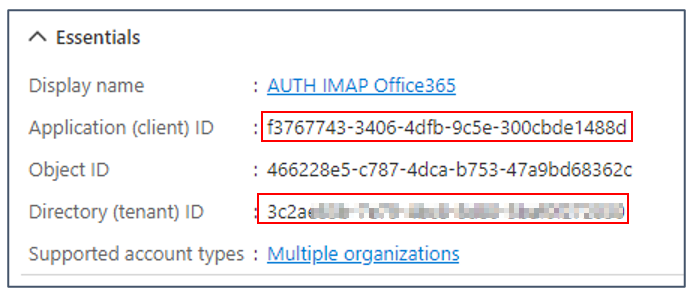
Return to the Overview tab and copy the following values and the secret seen above
Add API permissions
In the API Permissions tab
Click on your API (Microsoft Graph in this case)
Then select Delegated permission
Select :
email
offline_access
openid
profile

Setup GLPI
Now go back to your GLPI interface Setup > Application Aouth IMAP and indicate the information collected previously :
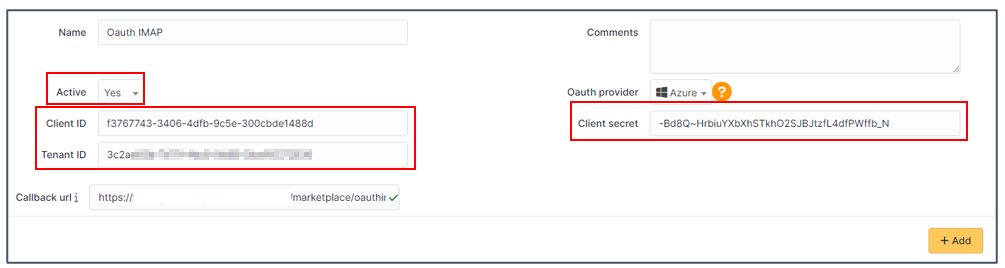
Click Add
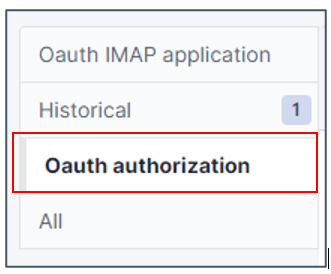
Now in the Oauth authorization tab, click Create an authorization
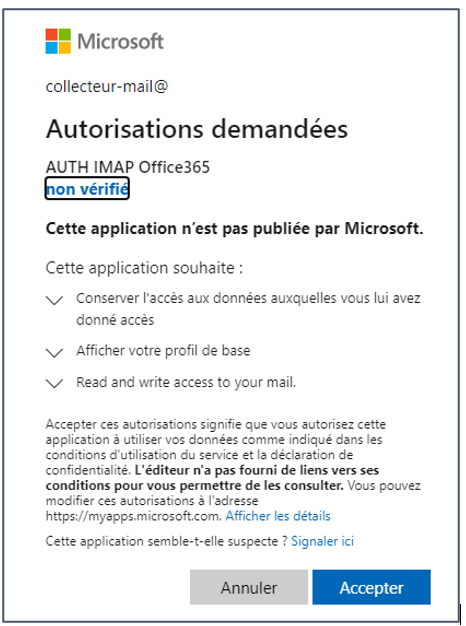
When you click on Create authorization, you will be redirected to the Microsoft services sign-in page
Enter the email address and password of the account that will be used for the collector
You will also need to accept the necessary permissions related to the plugin.

FAQ
If you have any questions about using the plugin, please consult our FAQ
