Datainjection
Download |
Sources |
|---|---|
Requisitos (localmente)
Versão do GLPI |
PHP mínimo |
Recomendado |
|---|---|---|
10.0.x |
8.1 |
8.2 |
- orphan:
Nota
This plugin is available without a GLPI Network subscription. It is also available on GLPI Cloud.
Instalação do plugin
Vá para o marketplace. Baixe e instale o plugin Data Injection.

Gerenciamento de direitos
Uma vez que o plugin tenha sido instalado através do marketplace, você pode configurar os direitos de acordo com o perfil.
Do Administração > Perfis, selecione o perfil em questão
Ir para Injeção de Dados
Para cada perfil de usuário, você pode conceder os seguintes direitos:
Gerenciamento de modelos: Ler / Atualizar / Criar / Limpar
Importar arquivo : Ler
Configuração
Você pode encontrar a configuração do plugin em Ferramentas > Injeção de dados A extensão é apresentada na forma de um assistente, cada operação é dividida em etapas e é possível retornar à etapa anterior para corrigir uma escolha.
Gerenciando ou usando um modelo
O primeiro passo permite que você escolha a operação a ser realizada, dependendo dos seus direitos.
Use um modelo existente no menu suspenso
Gerenciar modelos para:
Criar um novo modelo
Modificar um modelo existente
Excluir um modelo existente
Use um modelo existente
Criando um modelo
O primeiro passo é criar um modelo se nenhum existir.
De Ferramentas > Injeção de dados
Clique em Modelo
Clique em Adicionar

Definindo o modelo
Este passo permite que você defina as principais opções para a extensão.
Nome: o nome que será visível na lista suspensa
Visibilidade: define se será visível para outros usuários ou não
Entidade e subentidade: o modelo pode ser visível apenas na entidade de criação (subentidade definida como não) ou na entidade e todas as subentidades (subentidade definida como sim).
Comentário: um comentário para o modelo.
Tipo de dados a ser importado: o tipo de dados presente no arquivo a ser importado. Um arquivo consiste apenas em dados do mesmo tipo.
Permitir criação de linhas: informa ao plugin para criar objetos se a linha não corresponder a um elemento existente no banco de dados.
Permitir atualizar linhas: informa ao plugin para modificar objetos existentes usando os dados no arquivo.
Presença do cabeçalho: informa ao plugin se os cabeçalhos presentes no arquivo (localização, tipo de equipamento, modelos, etc.) devem ser criados. A criação também será limitada pelos direitos do usuário do modelo.
Update existing fields: the extension whether the data in the file can replace fields already filled in.
Date format: the date format is contained in the CSV file. If the format is incorrect, the date cannot be imported.
Decimal number format: the format used for the numbers in the CSV file. If the format is incorrect, the numbers cannot be imported.
After validation of the model, the following fields are added:
Presence of a header: indicates whether the first line of the CSV file is a header line, so that you can see the contents of the columns to identify the contents of the columns
File delimiter: field separator (by default a semicolon)
File to be injected
From the File to inject tab, you need to choose a file on your computer with exactly the same structure as the data already imported.
Then define the encoding (ISO8859-1 for Windows files, UTF-8 for Linux files. Automatic detection can be used to determine the encoding, but will slow down file processing. We strongly recommend that you always work in UTF-8.)
Once the file has been validated, you will be taken to the Mappings tab
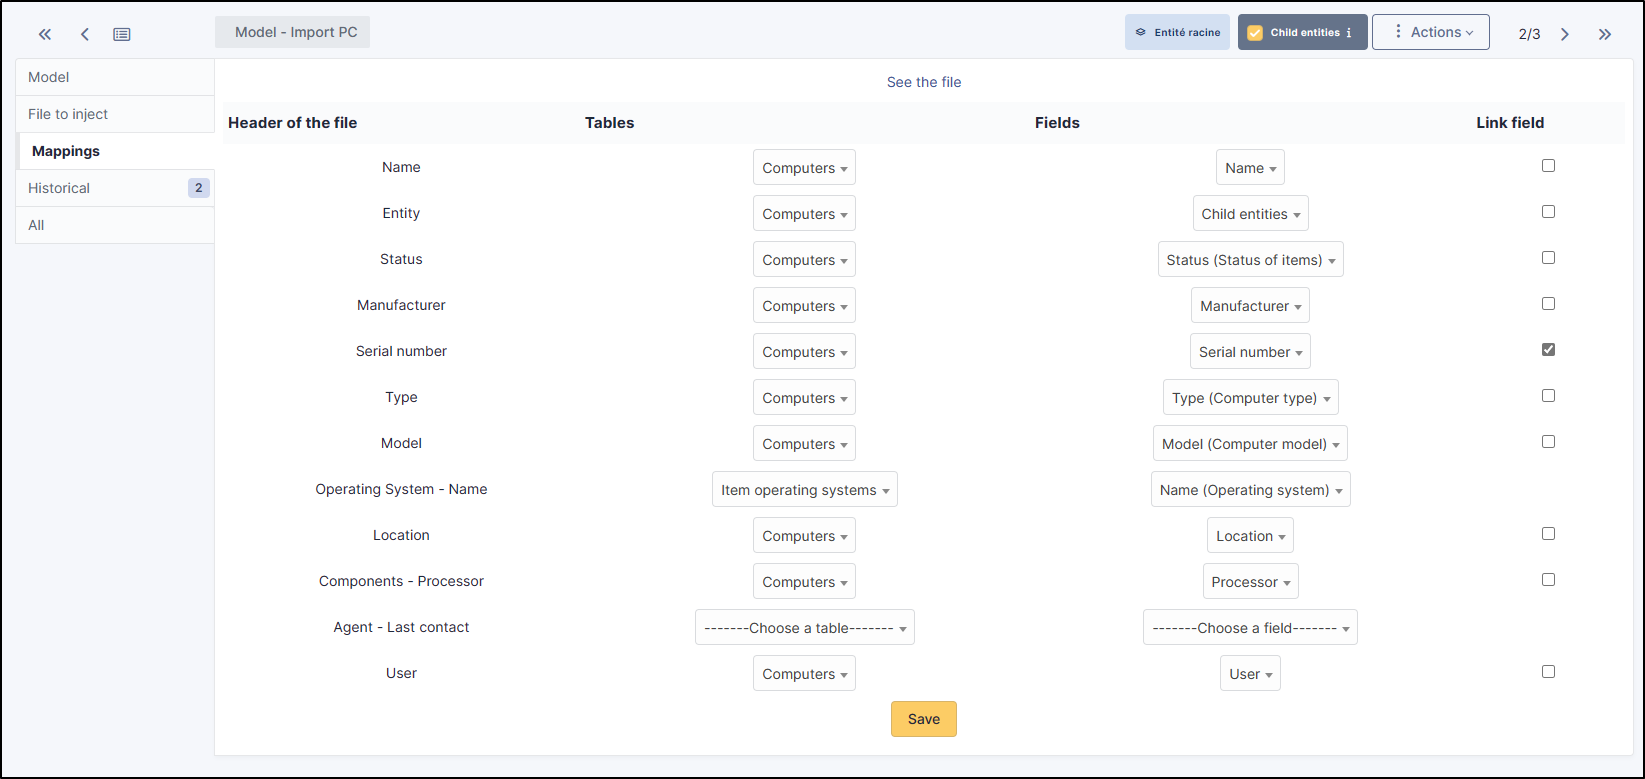
Mappings
This stage is essential. It defines, for each column in the file, the corresponding field in the database. The columns are identified by the content of the header line (presence defined in the previous step) or by their position (starting from 0). A separator error (in the previous step) will result in an incorrect split. The View file button is used to preview the first lines of the file and check their content and the interpretation made by the plugin.
For each column, you can choose
Do not retrieve data from this column (leave the Choose a table option)
Choose a table: the data type defined in step 2 or the financial information
Choose a field: which will be populated by the import
Link field: to indicate that this column will be used to check the existence of the data in the database and to choose between creating a new object or update. Candidate fields are, for example, the Serial number, the Name or the Inventory number
Aviso
It is mandatory to define at least 1 linking field. If a field is checked, it must be entered in your csv file used for importing.
Nota
It is possible to define Comments or Notes as the destination for several columns in the file. Each column will be added to the field on a different line. This step is particularly important and a wrong choice could damage the inventory data. It is therefore advisable to test the import on a test database or to and reserve this function for advanced users.
Additional information
This step is used to define the fields that can/should be populated by the user when a file is injected. For each field, the same value will be used for each line of the file and will take precedence over the contents of the file.
Table: the data type defined in step Matching
Field: will be populated by the import
Mandatory information: whether model user input is mandatory or optional
Exemplos de uso:
Data de compra ao importar uma nota de entrega
Comments to define a criterion that can be used in the search engine (e.g. IMPORT ON 31/10)
Model validation
From the Validation tab, you can confirm the registration. It is still possible to return to the previous steps to check and correct certain options.
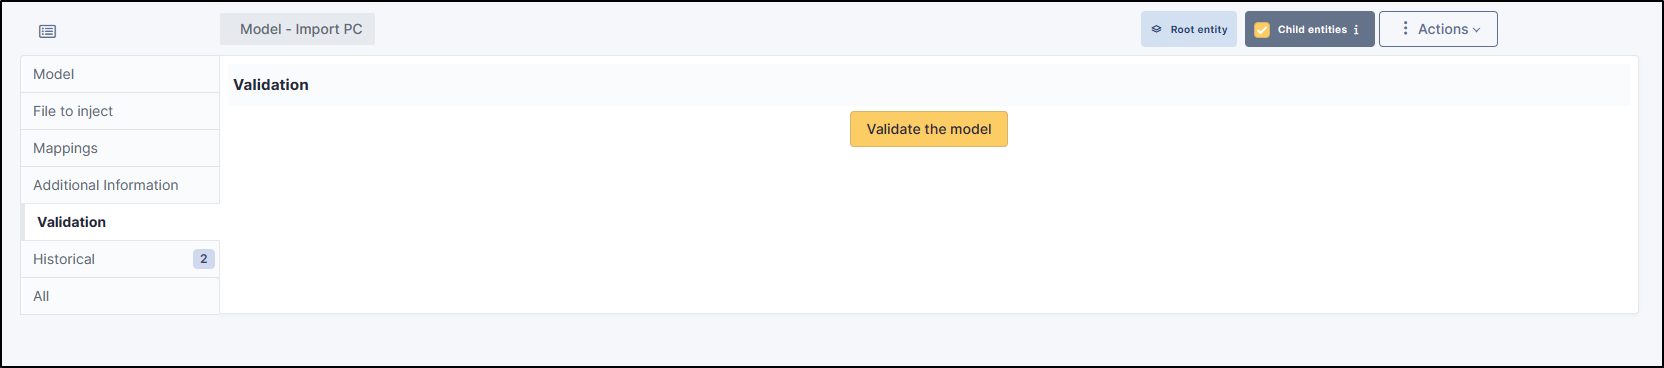
Aviso
If you are working with a sub-entity, you must select the desired entity before importing.
Nota
Some fields in your CSV file will need to be filled in as Booleans. This is the case, for example, with double-choice fields, such as: “Ports” (serial/parallel/USB) for printers. Instead of entering Yes | No in your CSV, enter 1 | 0 as appropriate. If these values are not changed, you will see an error in the report indicating that the wrong type of data has been entered.
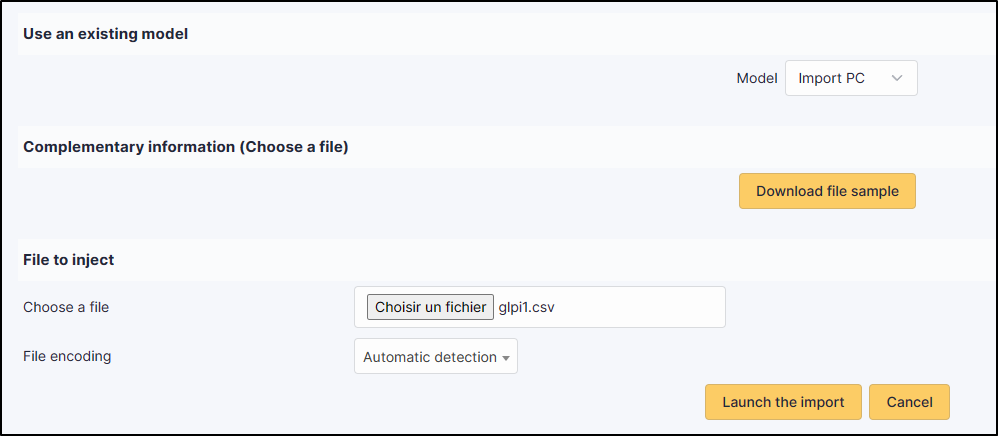
Usando um modelo
Escolhendo um modelo
De Ferramentas > Injeção de dados, selecione o modelo que você precisa na lista suspensa.
Em seguida, digite o caminho para o arquivo CSV a ser injetado.
Especifique a Codificação do arquivo se você souber. Caso contrário, deixe em Detecção automática.
Clique em Proceder com a importação
Confirmar antes de importar
Uma janela pop-up irá solicitar que você confirme ou não a importação do arquivo selecionado.
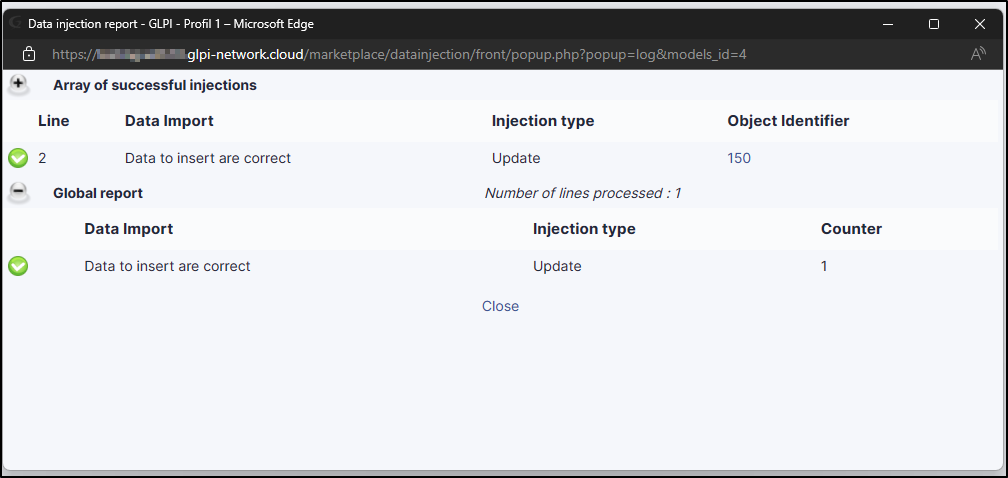
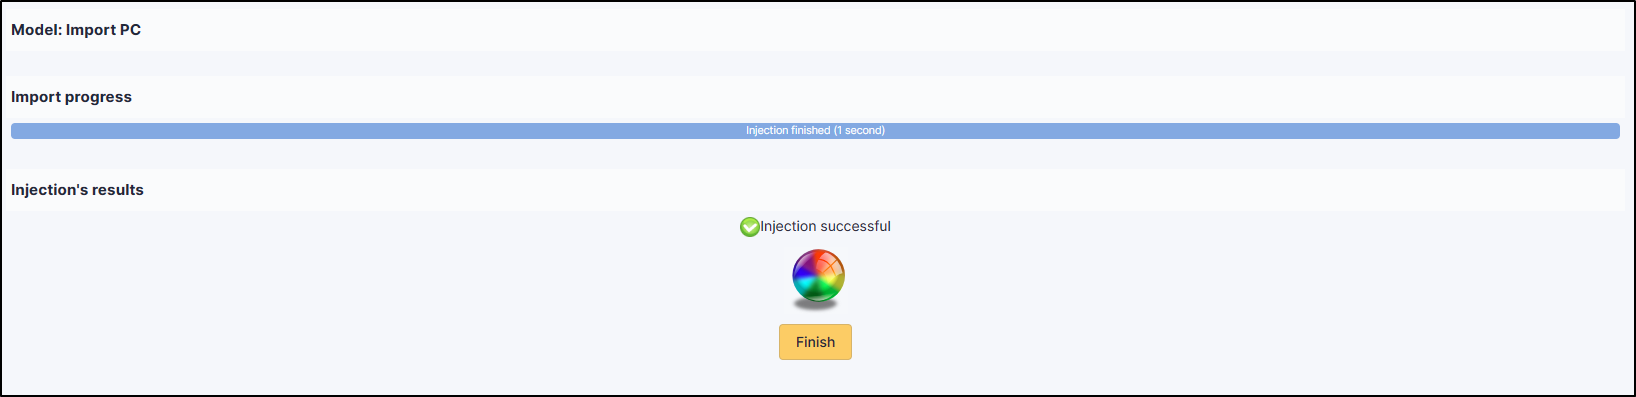
Importar resultado
A partir desta última etapa, ao clicar no círculo colorido, você pode visualizar um relatório sobre a importação e, em particular, localizar quaisquer erros.
Completar a operação
Uma janela pop-up irá perguntar se você deseja ou não confirmar a importação do arquivo selecionado. Assim que a barra de progresso estiver completa, clique em Concluir.
FAQ
If you have any questions about using the plugin, please consult our FAQ
