OKTA
References
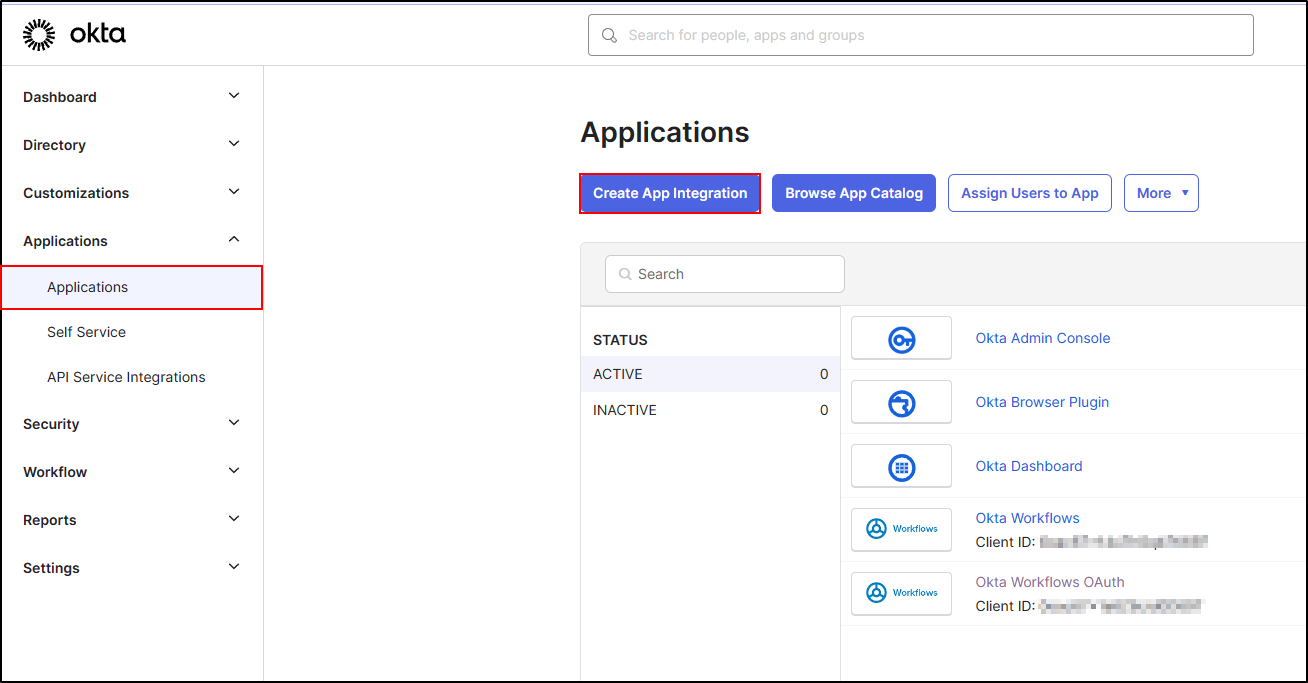
Create application
From your OKTA portal
Click on Applications
And Create app integration
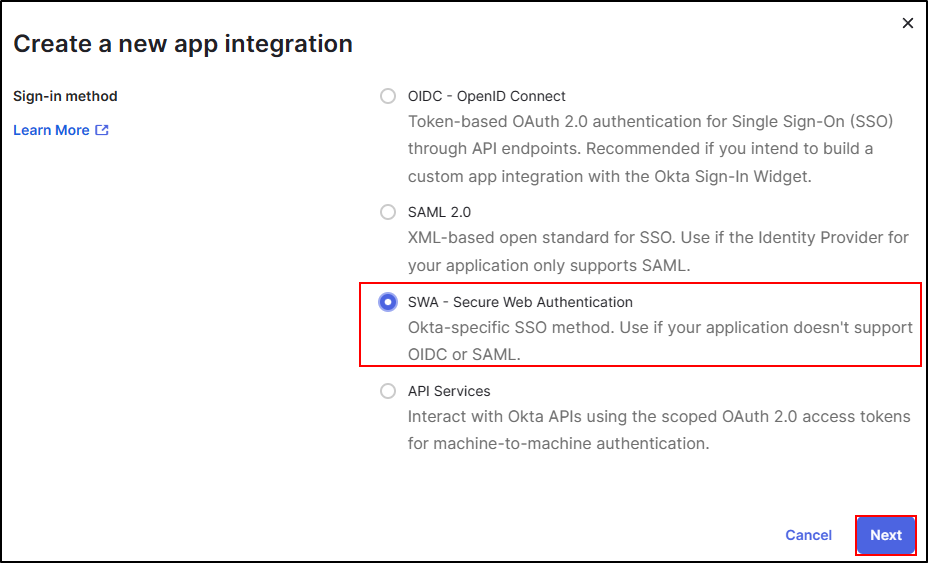
Select SWA - Secure Web Authentication
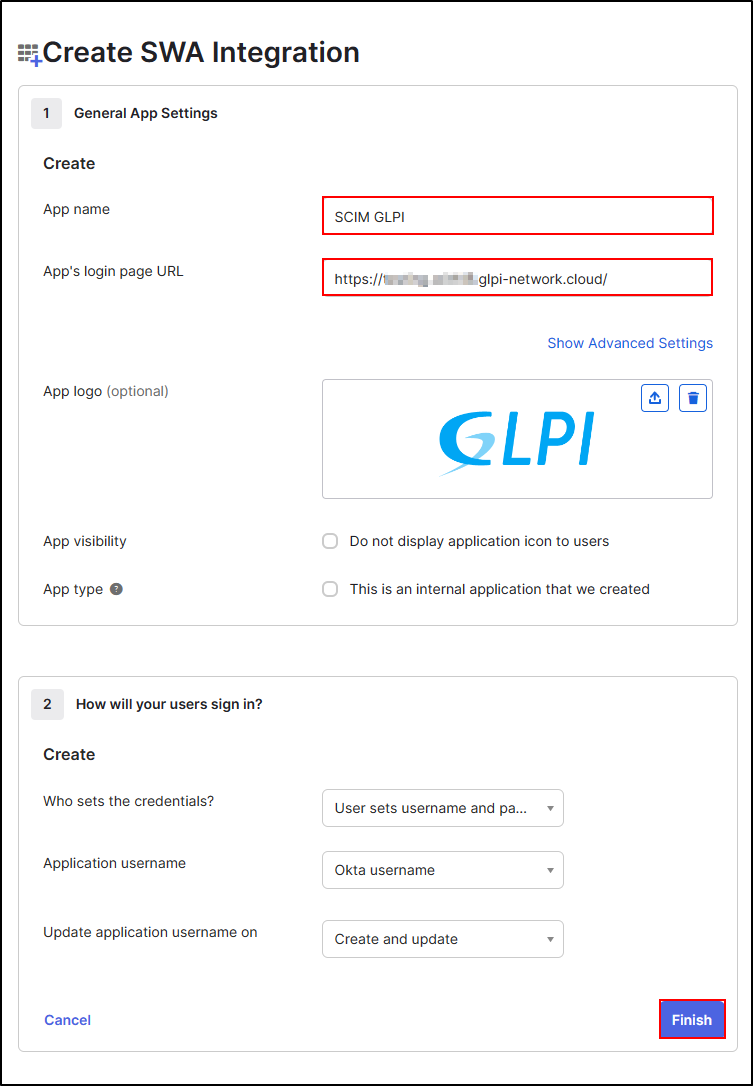
Add a name to your application
Add the URL of your GLPI instance (this will redirect your user to your GLPI if this application is avaiblable to the OKTA user portal)
Click Finish
Setup the application
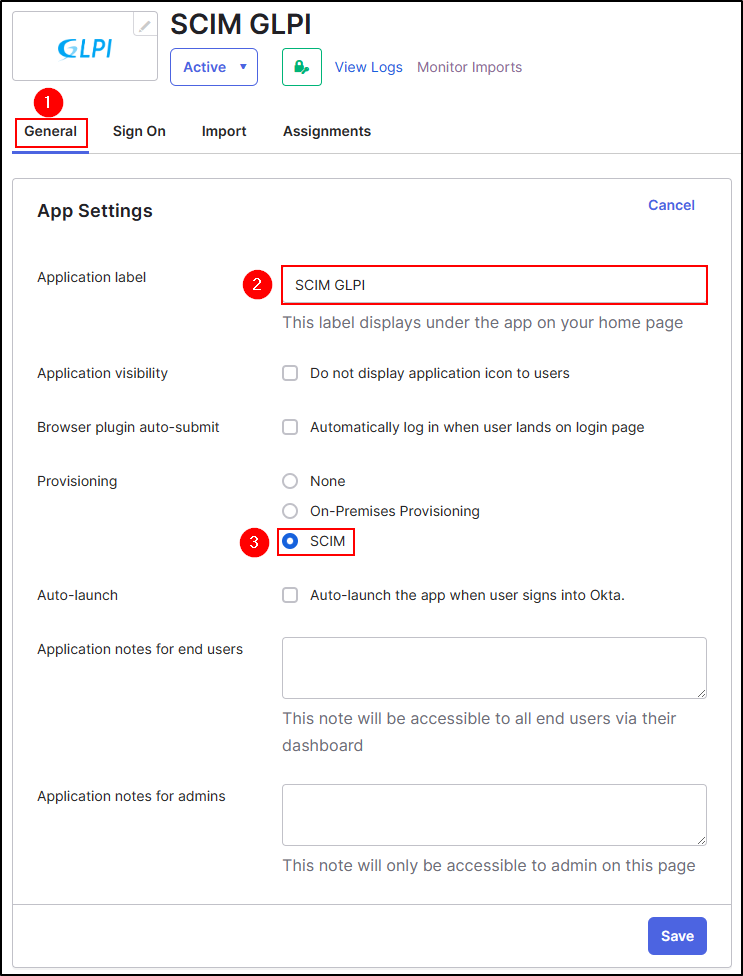
Go back to General
Click Edit
Name the label
Select SCIM to activate the service
Click Save
To setup the provisioning, you need to setup GLPI. Refer to setup GLPI to configure URL API and JWT Token
Copy the API URL and the JWT token, you need to paste this information in OKTA.
Go back to your OKTA application
Paste the API URL
Select the Unique identifier field for users (name.familyName, phoneNumber, name.givenName, id, userName, email, etc. This will be the method to authenticate the users)
Select the actions which can be supported
Select HTTP Header
Paste the JWT token
Importante
You need to paste the JWT token not the secret
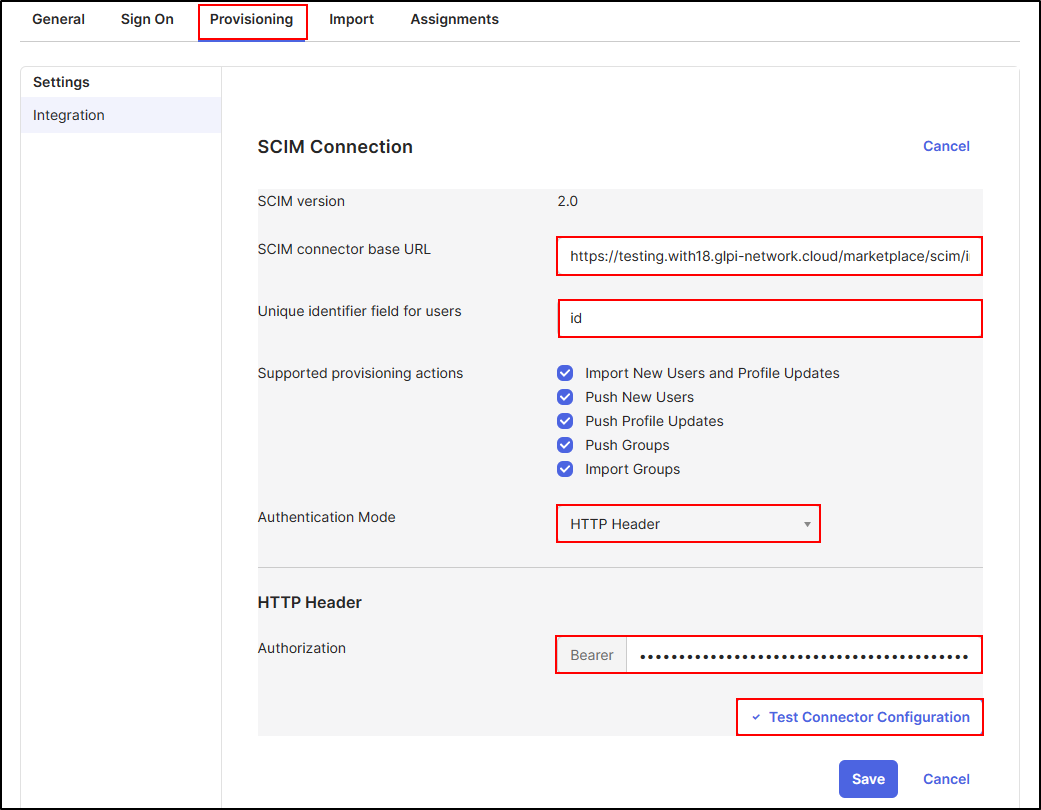
Click Test Connector Configuration
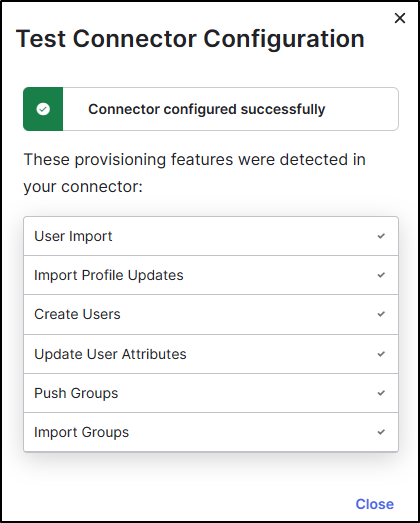
you can now close this window and save your configuration
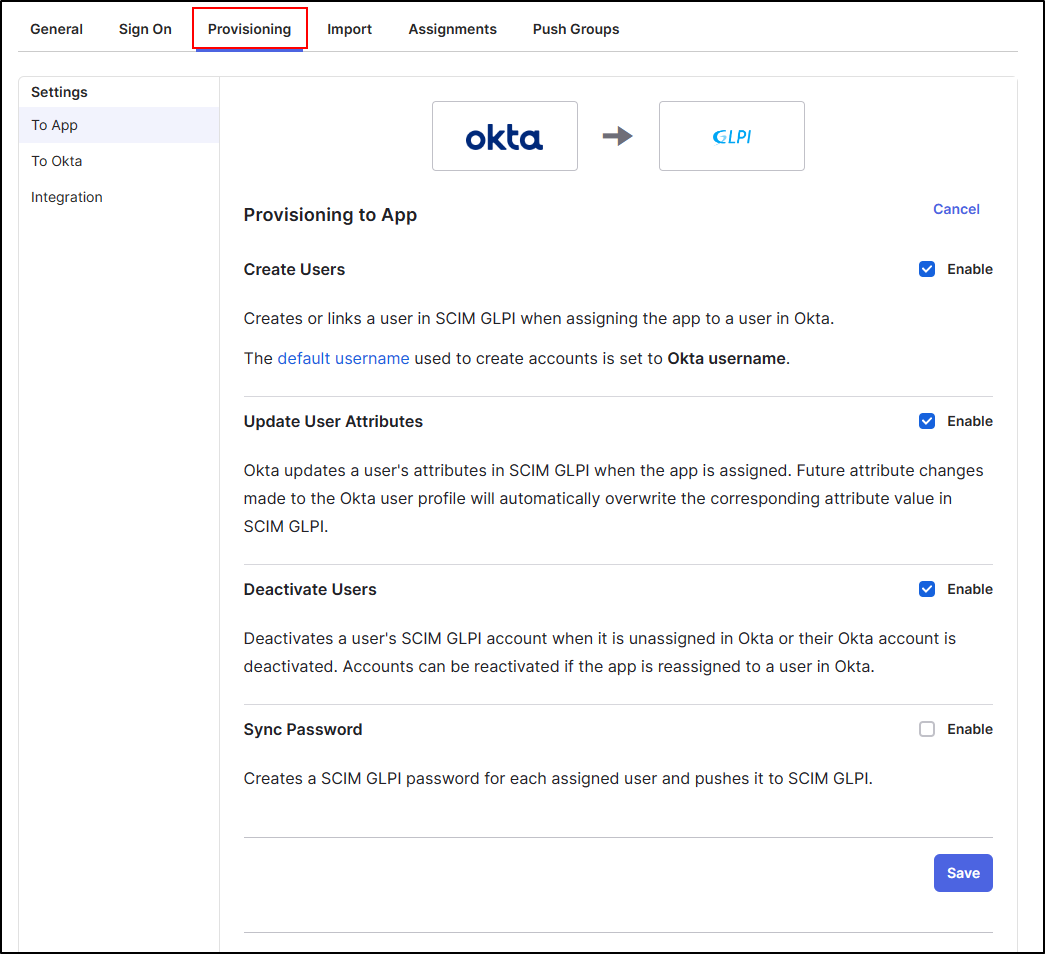
Always in provisioning, you can edit and select the possible actions for updating your user data.
Avvertimento
We recommand to unselect Sync Password and use OAuth SSO to authenticate your user.
The last step is to assign your application to users
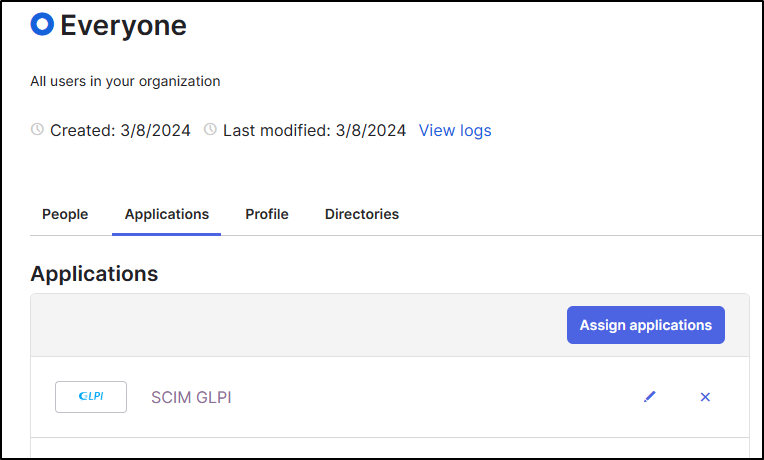
Synchronising all users
Go to admin console
Select Directory > Groups
Select Everyone
In Applications, click Assign applications
Click on assign on your SCIM application
Click Save and Go Back
Synchronising selected groups and users
Go to admin console
Select Directory > People
Select the User you want to import
In Applications, click Assign applications
Click on assign on your SCIM application
Click Save and Go Back
Repeat this step for all users and groups you want to import.
Importante
See the procedure for setting up the OAuth SSO plugin to authenticate users in GLPI.
