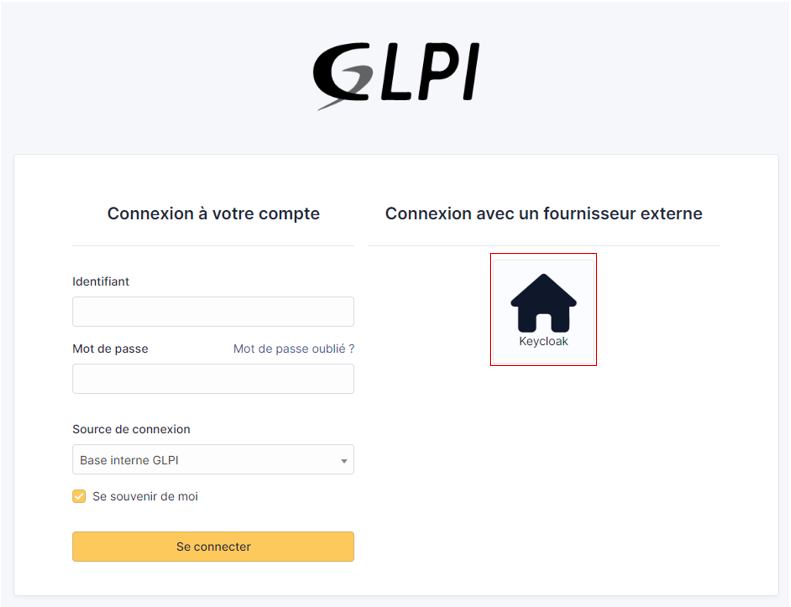
Keycloak
Create a REALM
After installing keycloak, go to the admin console:
http://XXXXXXXXXX:8080/admin or https://XXXXXXXXXX:8080/admin
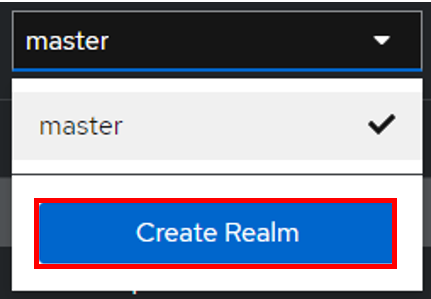
Create your realm by clicking on master at the top left of your screen
Then create Realm
Give it a name that suits you
Click on Create
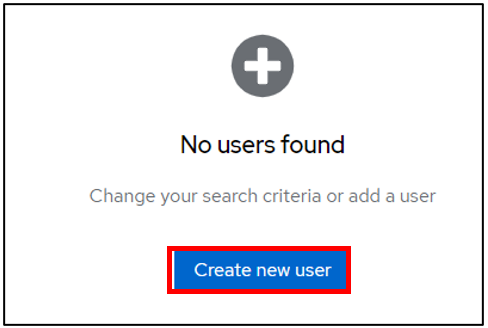
Create user
Then go to the Users tab
Then Create new user (we’ll use a local user, but you can synchronize your LDAP if necessary)
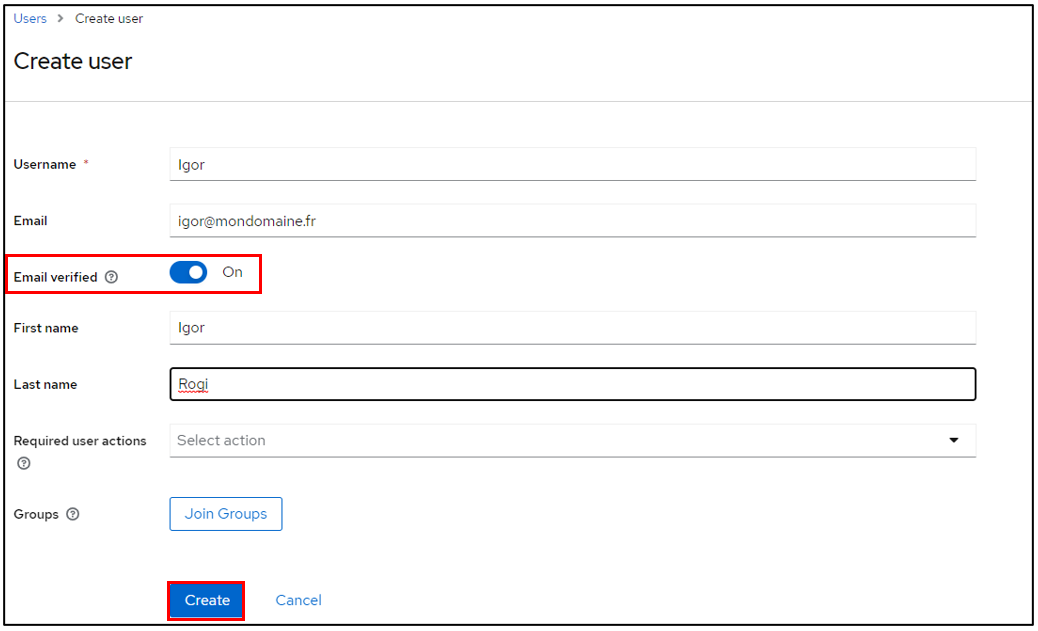
Create your user according to your needs, remembering to check the Email verified box
Click on Create once you’ve entered your details.
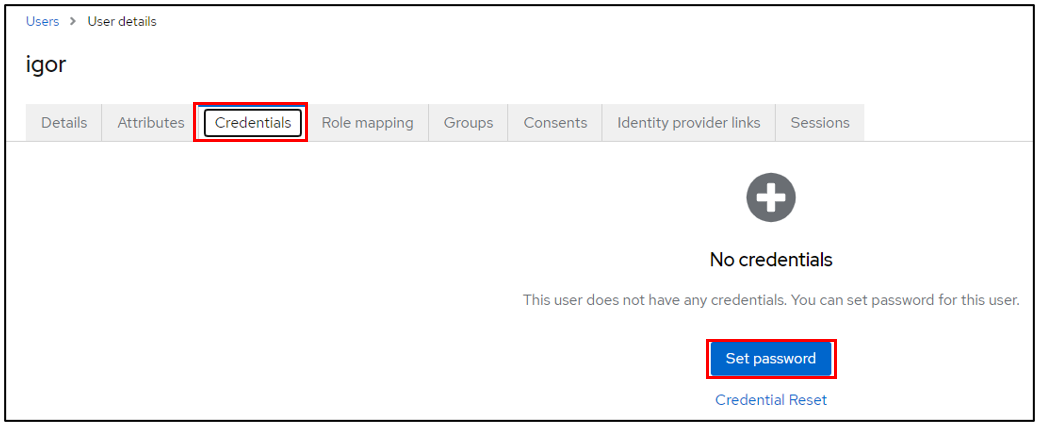
Stay in your user file and click on Credentials
Then Set pasword
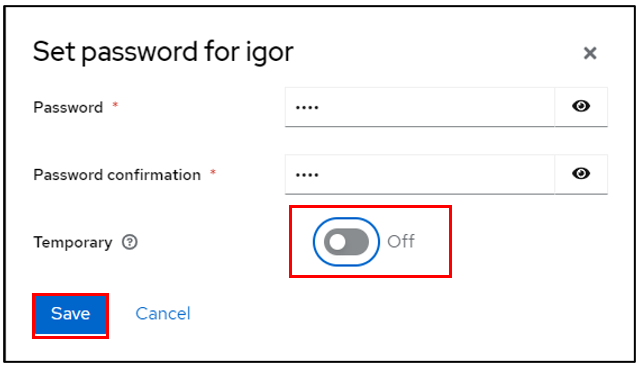
Configure the user password, taking care to indicate that the password is not temporary
Click on save then Save password
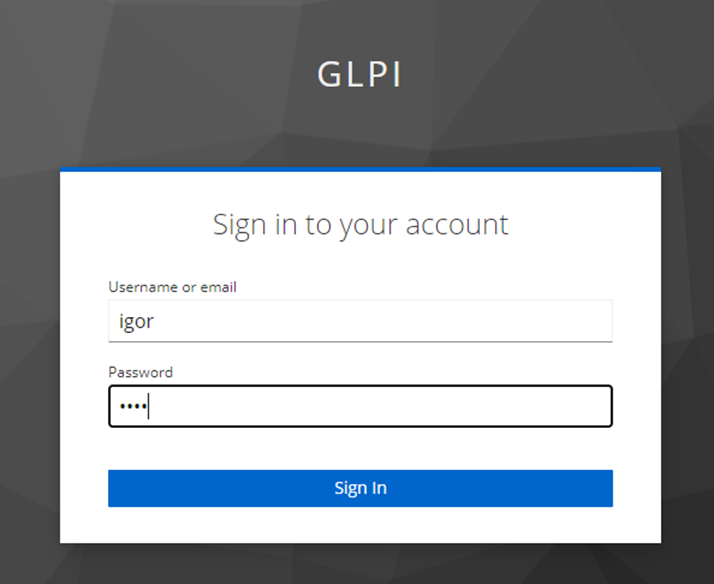
You can check that your configuration is correct by logging on to the user account console:
http://XXXXXXXXXXX/realms/GLPI/account/#/ or https://XXXXXXXXXXX/realms/GLPI/account/#/
(Remember to adapt the realm name if you haven’t named it GLPI).
You will then be able to connect to the record of the previously created user or one of your LDAP users.
Create client
Now we can register our GLPI application with Keycloak
Go to Clients
Create client

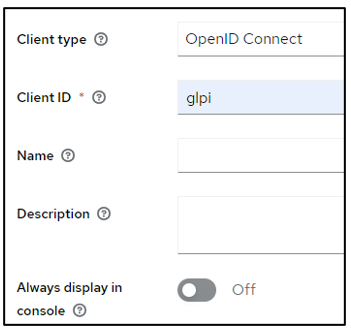
Give your application a client ID, which you’ll need to pass on to your GLPI Oauth SSO configuration
Click on next and make sure on the next page that the standard flow and client authentication options are active
Click on Save
Keep this page active, we’ll come back to it later.
Setup GLPI
Go to GLPI
In Setup > Oauth SSO applications click on add (at the top of your screen)

Start by retrieving the return URL and pasting it into Keycloak’s valid redirect URIs field
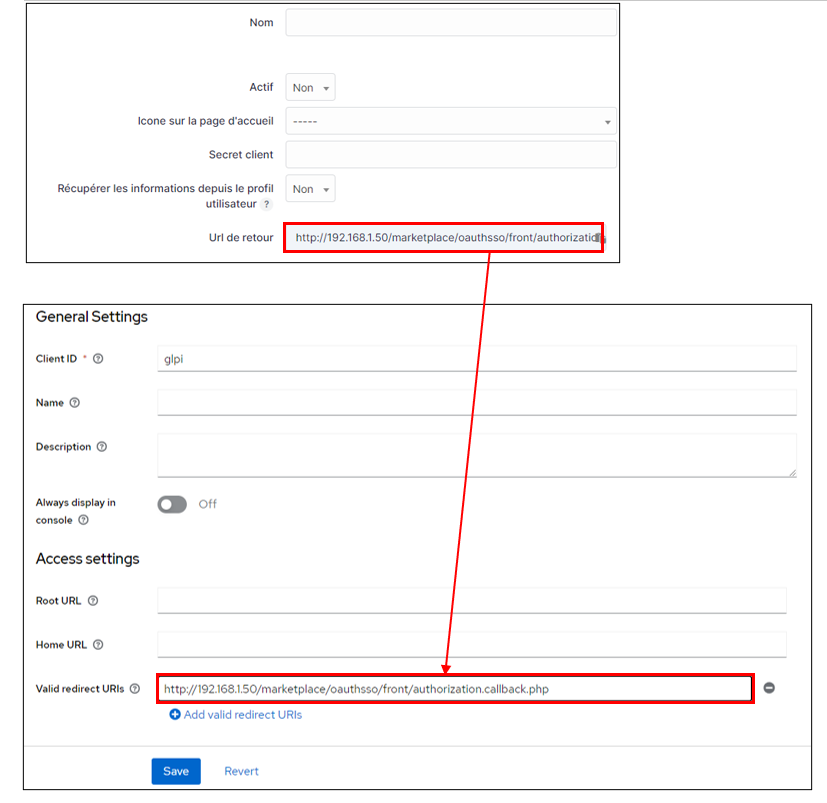
Back in GLPI’s Oauth SSO plugin configuration, fill in the required fields:

Give your provider a name, which will appear on the login page for users
Activate this plugin so that it is visible and usable on the login page
Choose Keycloak as your Oauth provider
Enter the client name set above
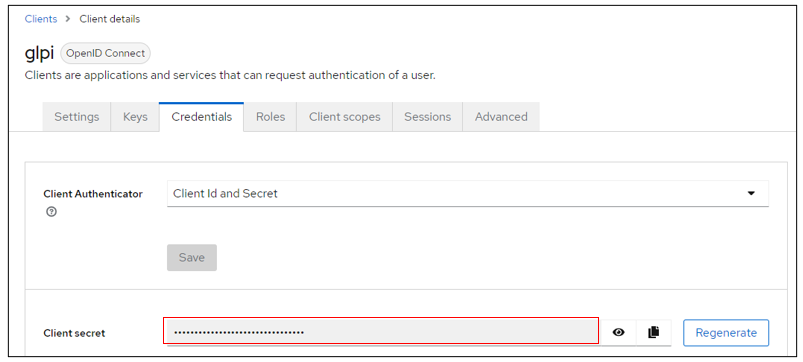
Retrieve client secret from Keycloak (client, client_name, credentials)
Enter the discovery URL: http://mondomaine/realms/monrealms/.well-known/openid-configuration.
Click on Add
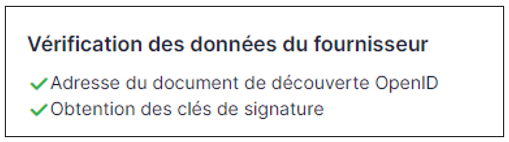
In the plugin, to see the approval message:
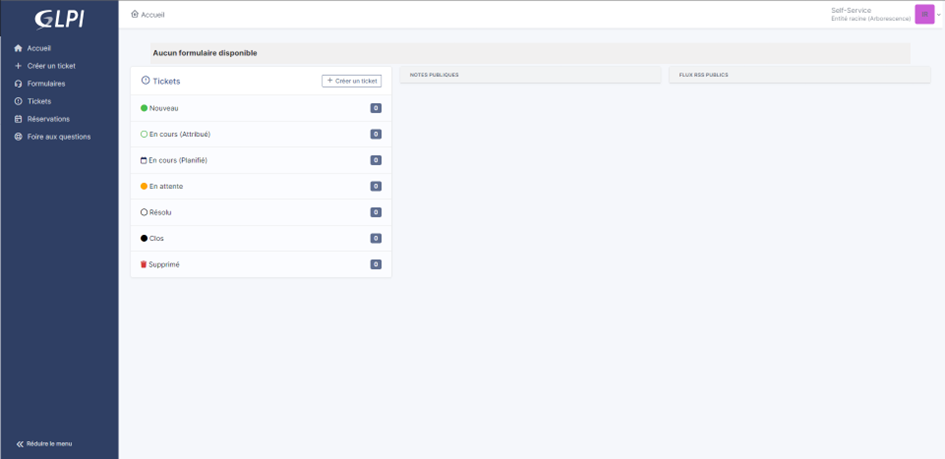
Now that configuration is complete, you can test the connection with the user you created earlier, or with your LDAP user.