Form yapılandırmaları
Form oluşturmak
Not
GLPI üzerinde varlıkları güncelleme hakkına sahip profillere form oluşturma izni verilir. Bu iznin nasıl kurulacağını öğrenmek için GLPI belgelerine bakın.
Not
Formlar, bulunmaları amaçlanan birimlerde oluşturulmalıdır. Alt birimler alanı Evet olarak ayarlanmışsa, bir form kendi biriminde ve tüm alt birimlerinde kullanılabilir.
Yönetim > Formlar bölümüne gidin.

Bir form eklemek için + düğmesine tıklayın
Şu alanlar doldurulmalıdır:
Ad: Formun adı.
Etkin: Bir form varsayılan olarak etkin değildir. Kullanıma hazır olduğunda etkinleştirmeniz gerekir.
Kategori alanını doldurmanız önerilir:
Basitleştirilmiş arayüzde, kategoriler formların bloklara göre düzenlenmesini sağlar.
Hizmet kataloğunu kullanmak istiyorsanız, form kategorilerini kullanmanız gerekir.
Not
Form kategorileri, eklentisinin açılır listeleridir. Kategori alanının yanındaki + simgesi ile bir formu düzenlerken doğrudan form kategorileri ekleyebilirsiniz. Bu işlemi Yapılandırma > Açılan kutu > Form kategorileri’ bölümünden de yapabilirsiniz.
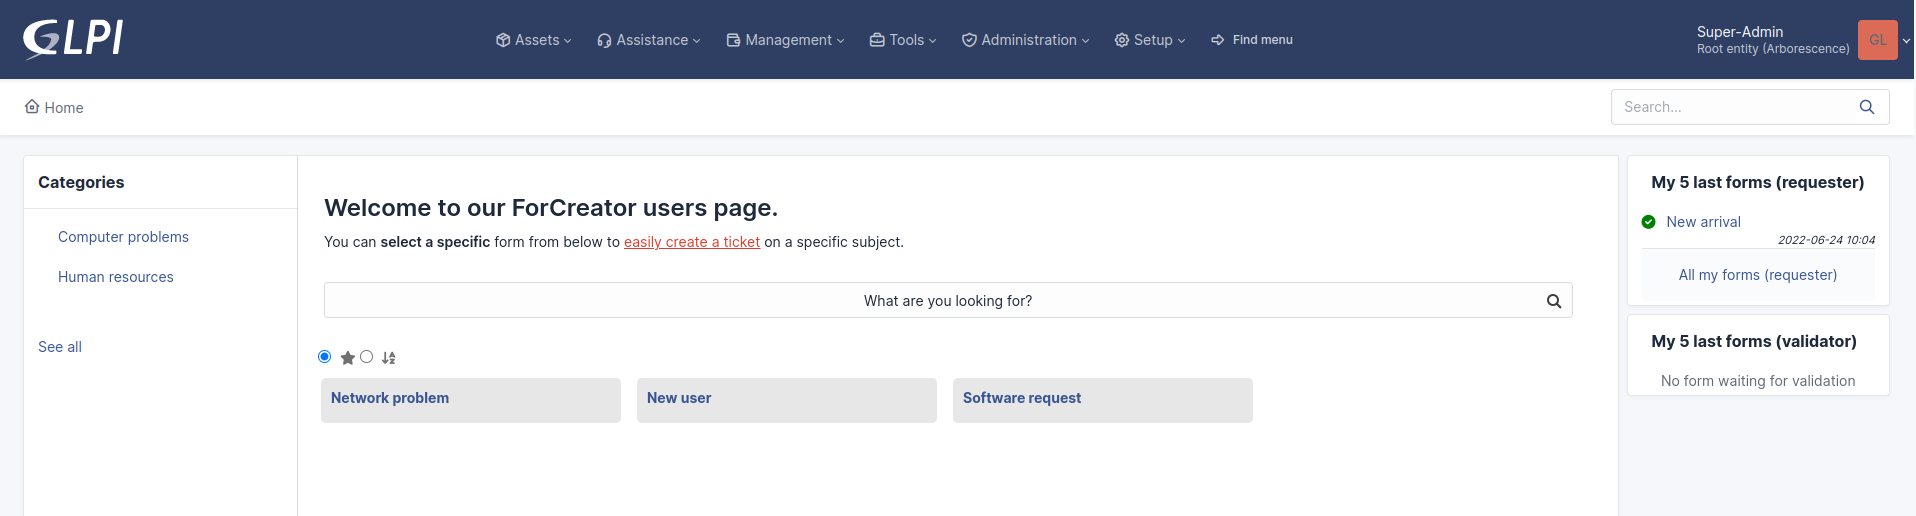
Ana sayfadan doğrudan erişim: Basitleştirilmiş GLPI arayüzünden forma doğrudan erişim sağlar.
Açıklama: Liste formlarında görüntülenir.
Dil: Varsayılan olarak bir form, oluşturan kişinin kullandığı dile ayarlanır. Form, yalnızca formla aynı dili kullanan kullanıcılar tarafından kullanılabilir. Formu dil kısıtlaması olmaksızın kullanıcılara sunmak için Tüm diller seçeneğini seçin.
Başlık: Form görüntülendiğinde görüntülenir.
Doğrulanması gerekiyor: Evet olarak ayarlanmış ise bir doğrulayıcı listesi görüntülenir. Formun birimiyle uyumlu bir birim üzerindeki GLPI kullanıcılarının (sağda Bir sorunu doğrula ya da Bir isteği doğrula (profilinde) ile listeler. Doğrulayıcıların listesi çoktan seçmeli bir listedir. Doğrulayıcı seçilmezse, form kullanılırken tümüne gönderilir.
Hizmet kataloğunun varsayılan formu: Evet ise form, geçerli kategori veya anahtar sözcüklere göre süzülmeden hizmet kataloğunda görüntülenir.
Tüm alanları doldurduktan sonra, sayfanın altındaki Ekle düğmesine tıklayın.
Not
Bir form ancak ilişkili bir yanıt yoksa silinebilir. Bir formu silmek için önce Form yanıtları sekmesinden tüm yanıtlarını silin.
Bölümler
Soru sekmesine tıkladıktan sonra aşağıdaki sayfa görüntülenir:

Önce bir bölüm oluşturmalısınız. Bölümler, formdaki soruları gruplamak için kullanılır.
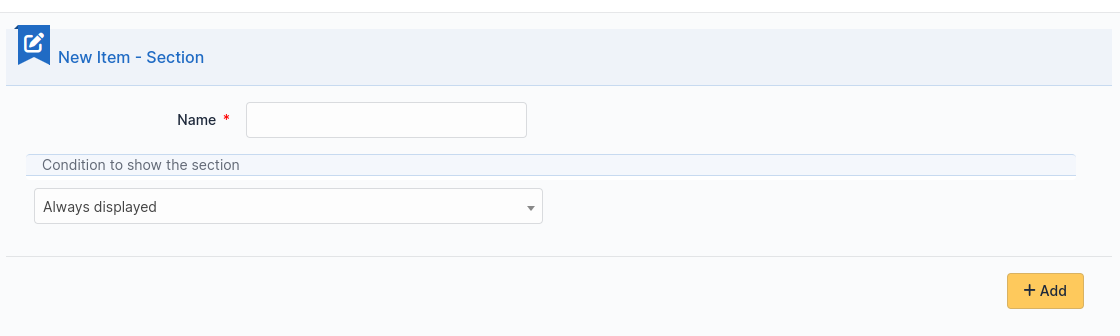
Formun diğer bölümlerinde yer alan sorulara verilen yanıtlara göre bölümün görüntülenmesini ya da gizlenmesini sağlaycak koşullar oluşturulabilir.
Sorular
İstediğiniz bir bölümde Bir soru ekle üzerine tıklayın.

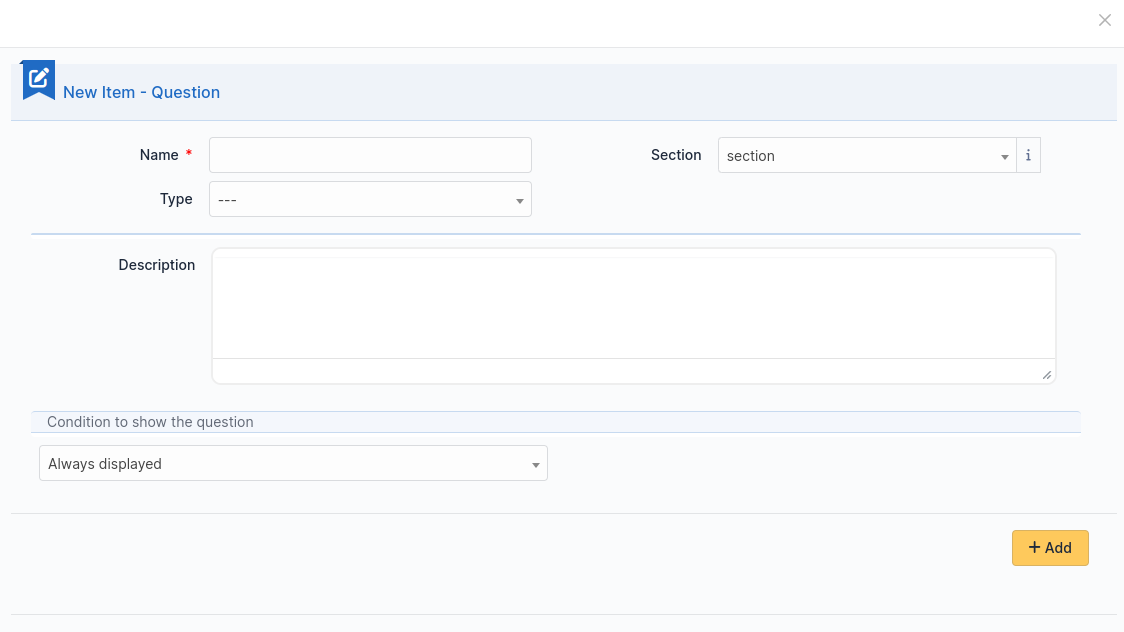
Şu sayfa görüntülenir:
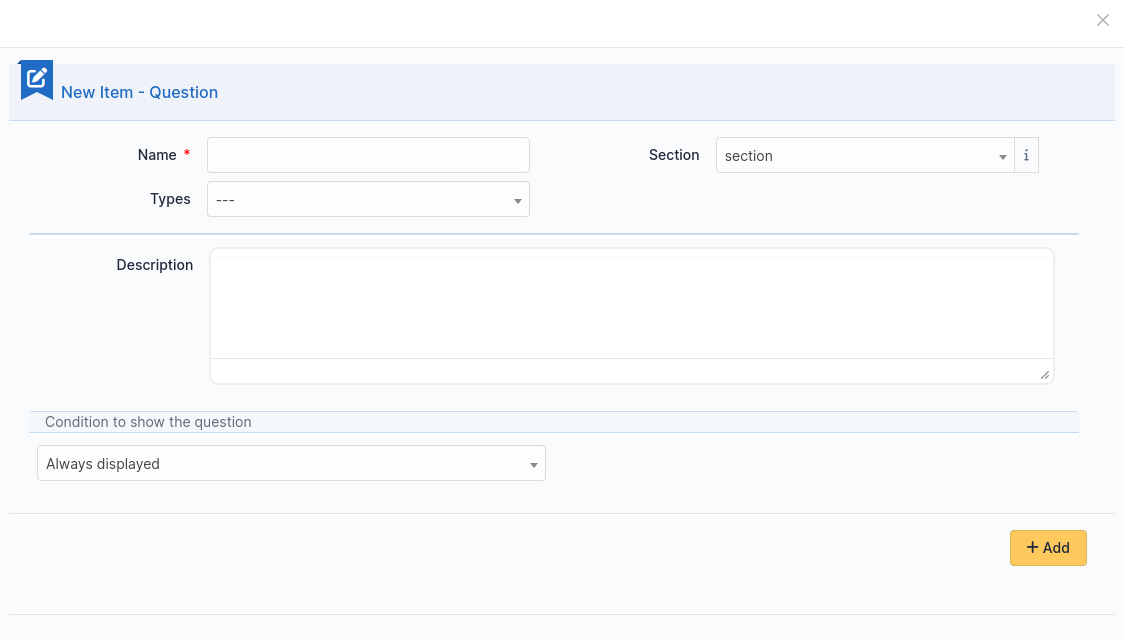
Bir soru şunlardan oluşur:
Başlık: Sorunun formdaki etiketi.
Tür: Aşağıdaki listeye bakın.
Bölüm: Sorunun bulunduğu bölüm. Bu alandan bir soruyu başka bir bölüme taşıyabilirsiniz.
Açıklama: Formdaki sorunun altında görüntülenir. Bu alanda olması beklenen içeriği açıklayan bir ipucu olarak kullanabilirsiniz.
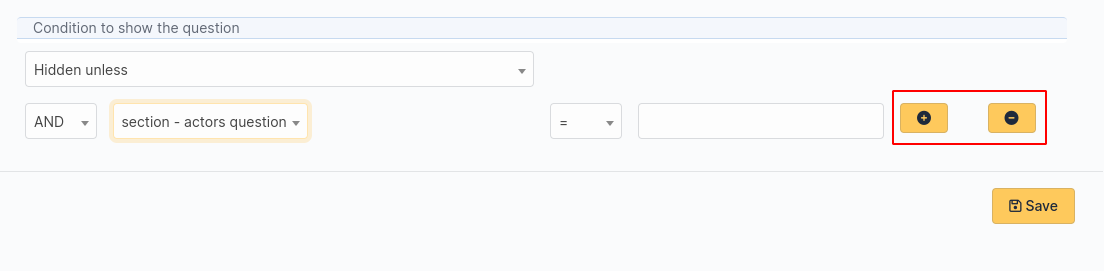
Bir koşulu etkinleştirmek için Alanı görüntüle açılır kutusu

Şu seçenekleri sunar:
Her zaman görüntülensin: Alan her zaman görüntülenir
Şu olmadan gizlensin: Diğer soruların yanıtları bir koşulla eşleşmediği sürece soru gizlenir.
Şu olmadan görüntülensin: Diğer soruların yanıtları bir koşulla eşleşmediği sürece soru görüntülenir.
Koşullar birden fazla olabilir. Bir koşul eklemek ya da kaldırmak için iki düğme bulunur:
Not
Simge listesi
Çember bir sorunun zorunlu kılınmasını ya da

ya da isteğe bağlı

Yukarı ok ve aşağı ok bir bölümdeki soruların sıralamasını değiştirmeyi sağlar.
Bir soru üzerine tıklanarak düzenlenebilir.
Üst üste iki kare bir soru ya da bölümün kopyasını oluşturur.
Çöp kutusu bir soru ya da bölümü siler.
Sorular 4 sütunlu bir dizi olarak düzenlenmiştir. Soruların genişliğini değiştirebilir, sürükleyip bırakarak sıralamasını değiştirebilir ve aynı satıra 4 taneye kadar soru koyabilirsiniz.
Soru türleri
Yaklaşık yirmi soru türü vardır. Seçilen türe bağlı olarak, ek bilgiler vermeniz gerekir.
Not
Zorunlu: Evet/Hayır. Formu çalıştırırken, yanıtlanması zorunlu olan soruların etiketinin yanında kırmızı bir yıldız görüntülenir.
Varsayılan değerler: İçeriği, sorunun türüne bağlıdır.
Aralık En az/En fazla: Forma yazılabilecek değeri belirtilen aralıkla sınırlar.
Ek doğrulama (kurallı ifade): Kurallı ifade kullanarak özel bir kurallı ifade belirtebilirsiniz. Diğer kısıtlama yöntemleri gereksinimi karşılamadığında kullanabilirsiniz. Kurallı ifadenin başında ve sonundaki sınırlayıcıları belirtmeyi unutmayın. Sınırlayıcıdan sonra değiştiriciler ekleyebilirsiniz.
Aktörler
Bu alan ile, bir veya birkaç kullanıcı seçebilirsiniz:
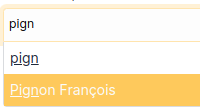
GLPI içinden Yönetim > Kullanıcılar bölümündeki kullanıcılar seçilebilir
GLPI dışından e-posta adresi yazabilirsiniz
İşaret kutuları (çoklu seçim)
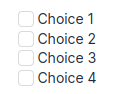

Değerler bölümünde her değer için bir satır ekleyin. Varsayılan değerler, her satıra bir tane olacak şekilde Varsayılan değerler bölümünden ayarlanabilir. Bu alan boş bırakıldığında hiçbir kutu işaretlenmez.
Tarih / Tarih saat / Saat
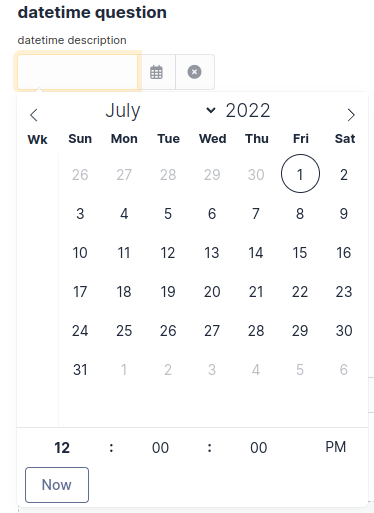
Bu alan mini takvimden bir tarih, tarih saat veya saat seçilebilmesini sağlar.
Açıklama
Bu alan yalnızca bilgi görüntülemek için kullanılır. Bir soru hakkında ayrıntılı bilgi vermek için kullanabilirsiniz.
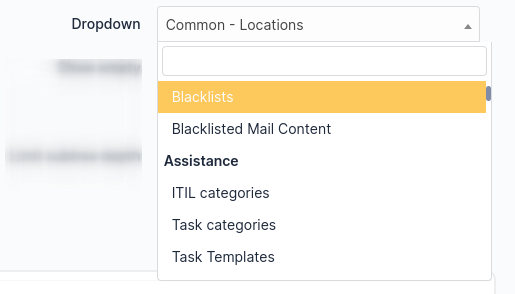
Açılan kutu
Bu alan, kullanıcının GLPI içindeki bir açılır menüde (Yapılandırma > Açılan kutular) bulunan kutular arasından bir değer seçmesini sağlar.
E-posta
Bu tür bir alanın yanıtı, söz dizimsel olarak geçerli bir e-posta adresi olmalıdır.
Dosya
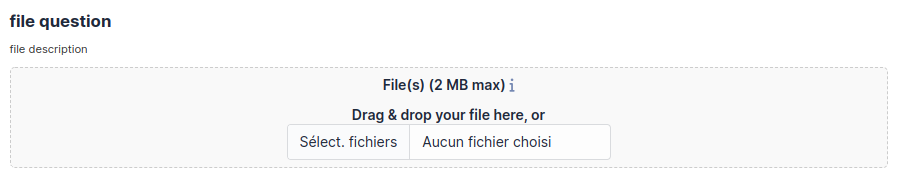
Bu alan, istekte bulunan kişinin bir dosya yükleyebilmesini sağlar.
Ondalık
Bu alanın yanıtı ondalık bir değer olmalıdır. Yanıtı daha sıkı kısıtlamak için bir kurallı ifade kullanabileceğinizi unutmayın.
GLPI nesnesi
Bu alan, menülerdeki GLPI nesnelerinden bir açılır menü oluşturulmasını sağlar:
Varlıklar
Destek
Yönetim
Araçlar
Yönetim
Sunucu adı
Bu alan formda görüntülenmez. DNS adının IP adresinden uygun şekilde çözümlenebildiği varsayılarak, istekte bulunan kişi tarafından kullanılan bilgisayarın adının alınmasını sağlar.
Tamsayı
Bu alanın yanıtı bir tamsayı değeri olmalıdır. Yanıtı daha sıkı kısıtlamak için bir kurallı ifade kullanabileceğinizi unutmayın.
IP adresi
Bu alan formda görüntülenmez. Formu doldurarak istekte bulunan kişinin IP adresinin alınmasını sağlar.
LDAP seçimi
Bu alan, bir LDAP dizinindeki nesnelerin bulunduğu bir açılan kutu oluşturmanızı sağlar:
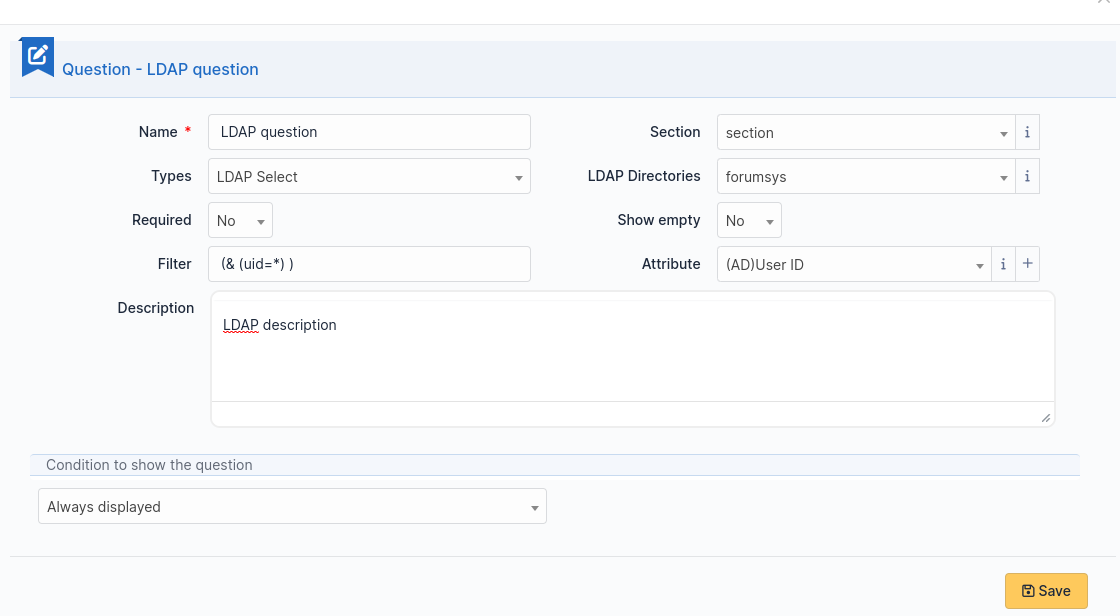
Not
Bu türdeki sorular bir hedefin aktörlerini doldurmak için kullanılamaz.
Çoklu seçim (birden çok seçenek)
Bu alan, birden fazla ögenin seçilebileceği bir açılan kutu oluşturmanızı sağlar. Kutuda görüntülenecek değerler, Değerler bölümünde her biri ayrı satırda olacak şekilde eklenir. Varsayılan değerler* bölümünden her biri ayrı satırda olacak şekilde varsayılan değerler ayarlayabilirsiniz. Varsayılan değer ayarlanmadığında, baştan varsayılan bir öge seçilmez.
İstek türü
Bu alan “Olay” veya “İstek” seçeneklerinin bulunduğu bir açılan kutudur. Form tarafından oluşturulan bir destek kaydının türünü ayarlamak için kullanılabilir.
Radyo düğmeleri (yalnızca bir seçenek)
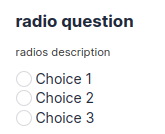
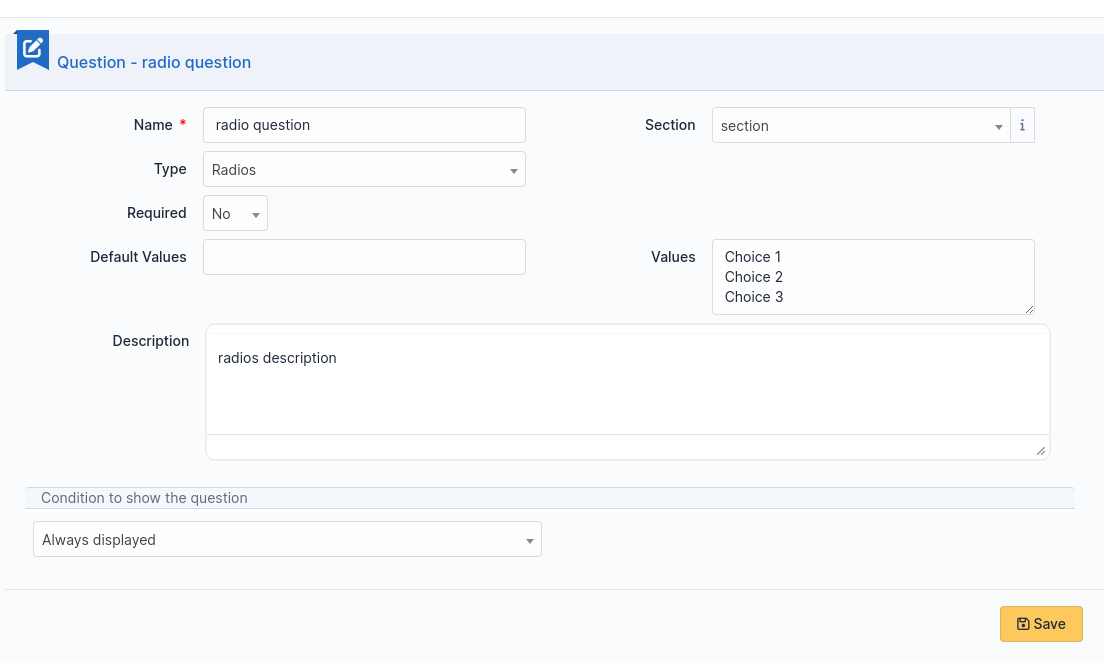
Değerler bölümünde her değer için bir satır ekleyin. Varsayılan değer, Varsayılan değer bölümünden ayarlanabilir. Bu alan boş bırakıldığında baştan hiçbir seçenek işaretlenmez.
Seçim (yalnızca bir seçenek)
Bu alan, bir açılır kutu oluşturmanızı ve kutuda görüntülenecek ögeleri ayarlamanızı sağlar. Ögeler, Değerler bölümünden her biri ayrı satırda olacak şekilde eklenir. Varsayılan değer Varsayılan değer bölümünden ayarlanabilir. Varsayılan değer ayarlanmadığında, baştan varsayılan bir öge seçilmez.
Metin
Bu alan, tek bir metin satırı yazılmasını sağlar.
Metin alanı
Bu alan, bir kaç satırlık metin yazılmasını sağlar.
Önem derecesi
Bu alan, GLPI içinde tanımlanmış bir önem derecesini seçmenizi sağlar.
Koşullar
Koşullar, bir şeyi belirlemek için değerlendirilecek soruları ve bölümleri içeren ifadelerdir.
Bir soru görüntüleniyor ise
Bir bölüm görüntüleniyor ise
Bir formda Gönder düğmesi görüntüleniyor ise
Bir hedef (aşağı bakın) oluşturulması gerekiyor ise
Bir değerlendirmede kullanılabilecek işlemler şunlardır:
şuna eşit olan
şuna eşit olmayan
şundan küçük olan
şundan büyük olan
şundan küçük ya da eşit olan
şundan büyük ya da eşit olan
görünür olan
görünür olmayan
bir kurallı ifadeye uyan
Koşul ifadesi aşağıdaki şu kullanılabilir:
Şu olmadığında gizli: ifade doğru olmadığı sürece öge gizlenir veya oluşturulmaz
Şu olmadığında görünür: ifade doğru olmadığı sürece öge görünür veya oluşturulur
Erişim türleri
Üç değer kullanılabilir:
Herkese açık erişim: Anonim kullanıcılar forma erişebilir. Bir Intranet sitesinde kullanabilirsiniz.
Özel erişim: Yalnızca GLPI hesabı olan kullanıcılar forma erişebilir.
Sınırlı erişim: Yalnızca belirtilen profillerdeki kullanıcılar forma erişebilir.
Bir form Herkese açık olarak ayarlandığında basit bir güvenlik kodu kullanılabilir. Bu güvenlik kodu, internet üzerinden erişilebilen formlarda istenmeyen gönderimleri önlemek için yeterli olmalıdır.
Not
Güvenlik kodu anonim formlarda varsayılan olarak açık değildir. Yöneticiler, forma internet gibi kötü niyetli girişimlerin yapılabileceği bir ağdan erişim biçimine göre bunu açmalıdır.
Hedefler
Bir formun üç tür hedefi olabilir:
Destek kayıtları
Değişiklikler
Sorunlar
Tek bir formdan herhangi bir sayıda hedef oluşturulabilir. Hedef türleri karıştırılabilir.
Bir hedef oluşturmak için Bir hedef ekle üzerine tıklayın

Ardından aşağıdaki pencere görüntülenir:

Bir hedef adı seçin ve yazın, ardından doğrulayın. Yeni hedef oluşturulur ve ayarları yapılabilir.
Ön izleme
Bu sekmede, formun nasıl görüntüleneceğine bakabilir ve etkinleştirmeden önce deneyebilirsiniz.
Not
Ön izlemeden gönderilen yanıtlar gerçekten kaydedilir ve form doğrulanacak şekilde yapılandırılmamışsa hedefler oluşturulur.
Form yanıtları
Bu sekmede, formun kaydedilen tüm yanıtları görüntülenir.
Not
Bir formu silmek için önce tüm yanıtlarının silinmesi gerekir. Bir anımsatıcı olarak bir formun ana sekmesinin altında bir uyarı görüntülenir.
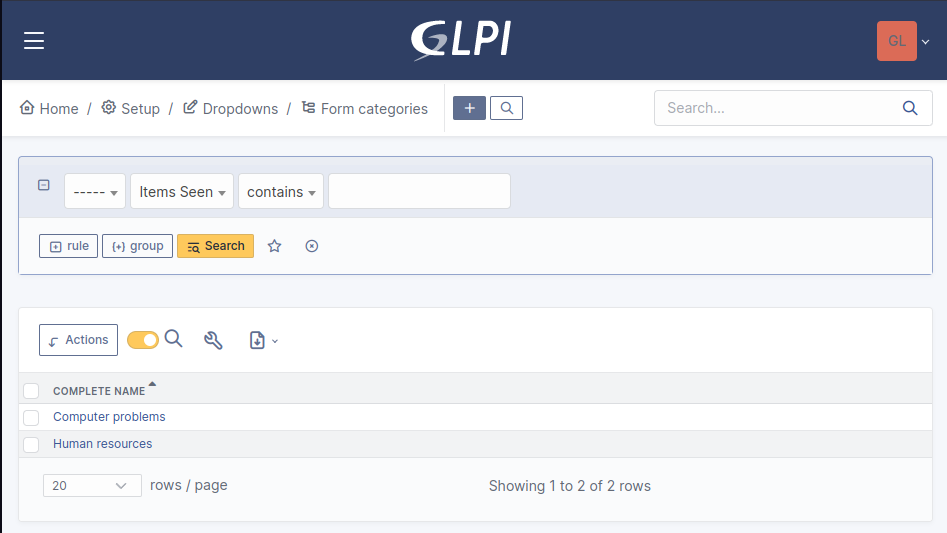
Kategoriler
Menu : Ayarlar > Açılan kutular : Formlar > Form kategorileri
Form kategorileri, form listenizi düzenlemenizi sağlar. Formlar, seçilen kategoriye ya da herhangi bir alt kategoriye ait olduklarında görüntülenir. Herhangi bir kategorisi olmayan bir form, yalnızca herhangi bir kategori seçilmediğinde ya da kullanıcı “tümünü görüntüle” seçeneğini seçtiğinde görüntülenir.
Kategoriler genel olarak Ayarlar > Açılan Kutular menüsünden eklenip düzenlenebilir.
Ayrıca yeni kategoriler, tüm diğer GLPI açılan kutuları gibi doğrudan form sayfasından eklenebilir.
Varlıklara göre tanımlanırlar ve GLPI 0.85 sürümünden itibaren tüm diğer açılan kutular gibi başka dillere çevrilebilirler.
Not
Genel GLPI yapılandırması sayfasından açılan kutu çevirileri etkinleştirilmiş olmalıdır: Yapılandırma > Genel > Genel Yapılandırma > Açılan Kutu Çevirileri = Evet
Not
Kategoriler Bilgi Bankası Kategorileri ile ilişkilendirilebilir. Formların yanında yazılan konuya göre SSS kayıtlarının görüntülenmesi için bu bağlantı gereklidir.
Yapılandırma
Görünüm oluşturma
Sorular
Formu oluşturduktan sonra kullanıcının dolduracağı alanları oluşturun.
Soruların adları solda, seçilmiş alan türü sağda görüntülenir.
Açıklama doldurulacak alanın altında bulunur.
Seçilmiş soru türüne göre ek seçenekler görüntülenebilir.
Girişin doğrulanmasını isteniyorsa, PHP kurallı ifadeleri kullanılabilir.
Soruların, diğer sorulara verilen yanıtlara göregörüntülenmesini istiyorsanız bir soruyu düzenlerken alanlar görüntülensin bölümünü kullanın. 2.5.0 sürümünde bir kaç sorunun içeriğini denetlemek için karmaşık ifadeleri ile VEYA ve VE* mantık işlemleri kullanılabilir. VE işleminin VEYA işlemine göre önceliği vardır.
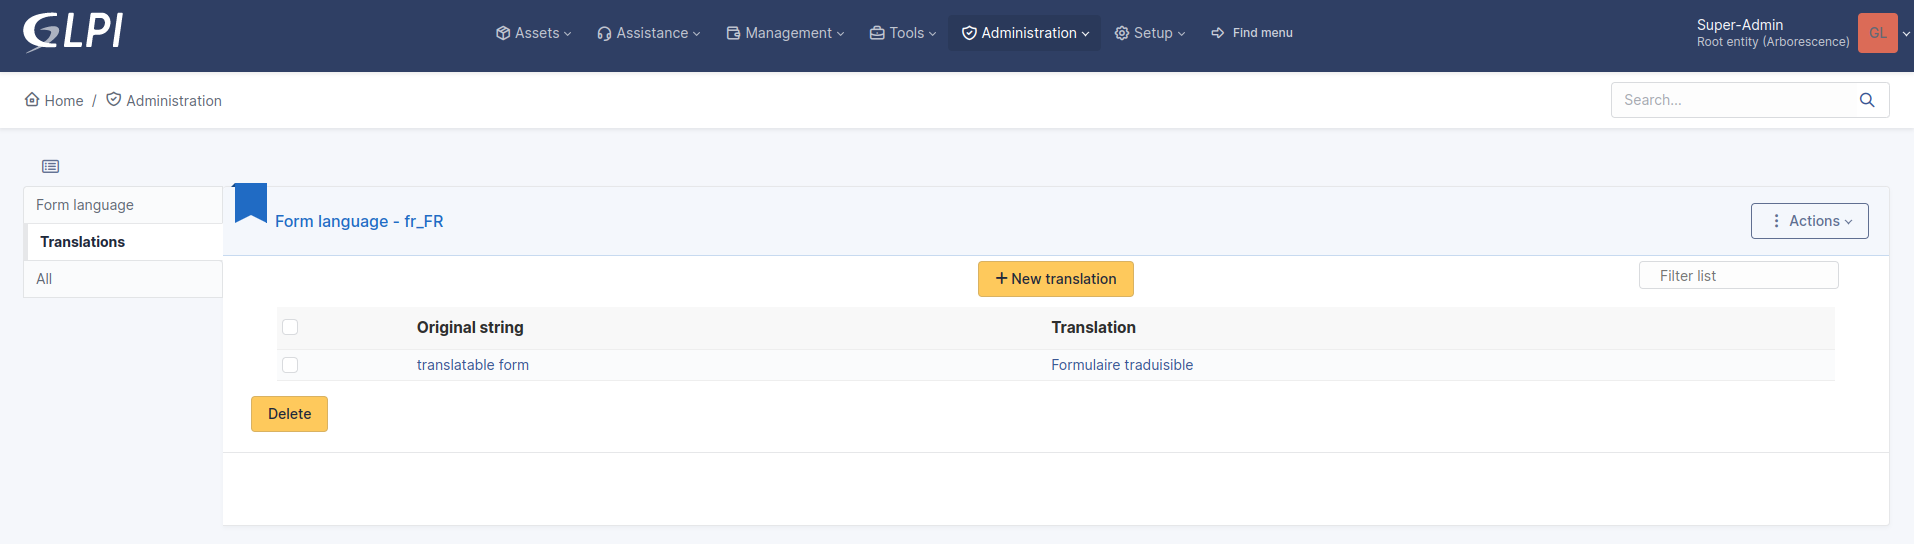
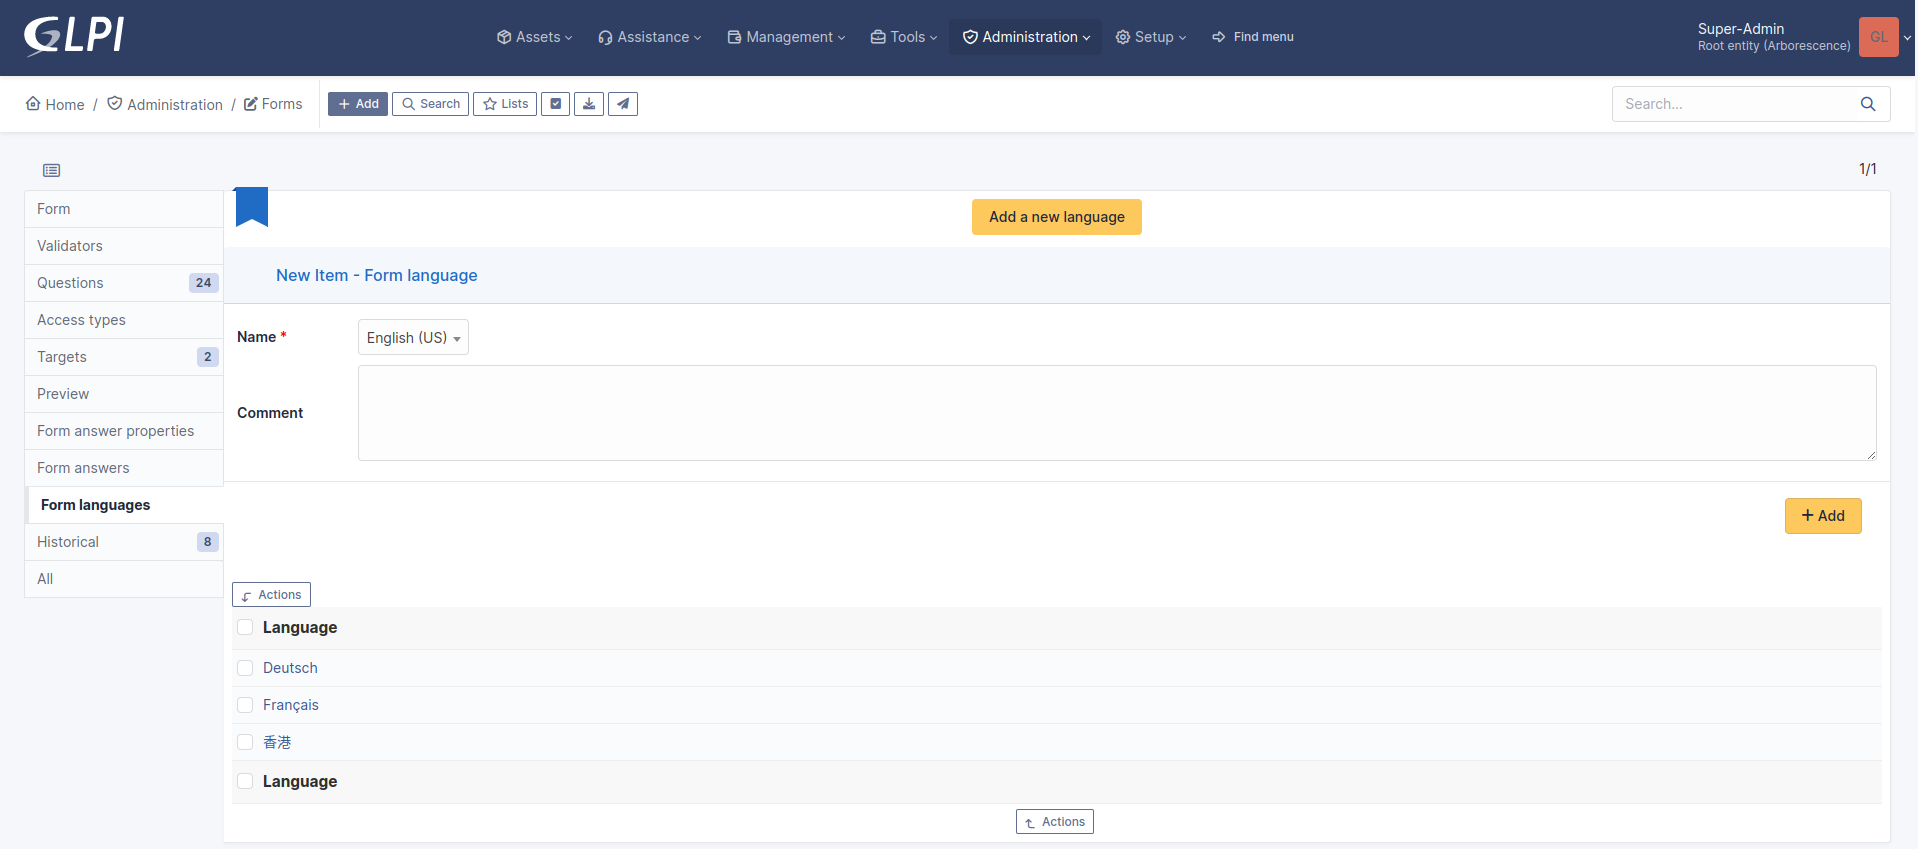
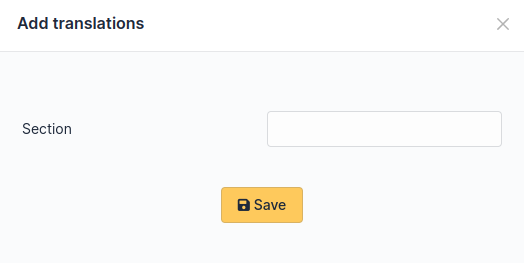
Çeviri
Bazı durumlarda bir formun birden fazla dilde olması gerekir. Önce formun hangi dilde oluşturulacağını seçin. Bu dil İngilizce (ABD ya da İngiltere) ya da hedef kullanıcıların çoğunun anladığı dil olmalıdır. Alternatif bulunamazsa bu dil, varsayılan dildir.
Bu dil aynı zamanda çeviri sürecinde referans olarak kullanılır. Ardından, seçilen dilin formu çevirecek kullanıcı tarafından okunabilir olduğundan emin olun.
Bir formu çevirmek için Form dilleri sekmesini açın. Ardından kullanıcılara sunmanız gereken tüm dilleri oluşturun.
Forma eklenen bir dili seçin ve çeviriye başlamak veya sürdürmek için tıklayın. Ardından Çeviriler sekmesini seçin. Yeni çeviri düğmesine tıklayın. Bir pencere açılır ve çevrilecek bir dizge görüntülenir. Çeviriyi yazın ve klavyenizdeki Enter tuşu ile kaydedin veya doğrulayın.
Başka bir dizgenin çevrilmesi gerekiyorsa, hemen görüntülenir. Daha fazla dizgenin çevrilmesi gerekmiyorsa, bir ileti görüntülenir.

Pencereyi kapattığınızda çevrilmiş dizgelerin listesi yenilenir. Bir çeviriyi üzerine tıklayarak düzenleyebilir, listenin solundaki işaret kutuları ve Sil düğmesi** ile bir veya birkaç çeviriyi silebilirsiniz. Ayrıca süzgeç alanını kullanarak listeyi süzebilirsiniz.